Film Photography on the Cheap

Table of Contents
So — what’s going on?⌗
To put it short, Kodak is increasing the prices of their films once again. Most price increases will be around the 10% mark, but some unfortunate ones, such as Kodak Gold, will go up by a whopping 30%.
Implications of price increases⌗
I was watching Overexposed’s video on this. He ended it with a small rant about how these constant increases in price will essentially kill film photography. When YouTubers hype cameras up, their prices skyrocket. Kodak raises the price yearly, way above the rate of inflation. Even the hemicals are getting more expensive. Film photographers just can’t catch a break.
Only one question remains, then — how do I keep shooting film without getting ruined?
Making a few things clear (for dumb Americans)⌗
I’m European. My country, Sweden, never signed some document about the euro and we ended up just keeping the Swedish crown as our currency. I will be discussing prices in this post in euros. If you need to check the difference between dollars and euros, just google it.
This also means that it might be possible to get stuff for even cheaper in the US or other parts of the world. Or that the tips I leave in the post may cost more in the US than in Europe (Foma products for example).
This post is also meant for someone that isn’t already well versed in the world of film photography. This is to be seen as a guide for total noobs.
It’s black and white⌗
Start shooting black and white. B/W photography is what will get you into the darkroom for real and actually do your own prints. It’s easier to handle in all ways compared to colour negatives and it’s hell of a lot cheaper. If you want to get into cheap photography, you have no choice. Unless you bulk roll cinema film, but we’ll touch more on that later on.
Oh, and one last thing. You need to develop your film yourself.
Now, onto the steps!
The steps!⌗
Step 1 - Bulk roll⌗
Bulk rolling means that you buy a long, usually 30m, spool of film. You then, in complete darkness, load it into a little machine that enables you to load empty film cassettes with film from the spool, all in complete daylight!
To begin, you need to buy the film and the machine, of course. But you also need a pair of scissors, empty film cassettes and some strong tape.
You can buy already empty cassettes on most welk stocked shops for analogue photography, or ask your local lab if they have old film cassettes that they haven’t opened.
So, the price? Let’s start with Ilford HP5.
A roll of Ilford HP5 costs 9 euros at fotoimpex as of writing this post.
A 30m bulk roll of HP5 costs 130 euros at fotoimpex as of writing this post post.
What does that mean?
A 30m bulk roll is split up into roughly 18 rolls. So 130 euros divided by the 18 rolls means that you get €7,20 per roll, compared to €9.
If you do the same comparsion for Fomapan, you end up saving more than half the cost. A 36 exposure roll of Foma400 costs about €5,50 whereas a bulk loaded roll of Foma400 ends up at €2,55
Step 2 - Cheap chemicals⌗
Having left the film itself behind, you also need to be able to get your hands on cheap chemicals. I would strongly advise any newcomer to buy Rodinal, Fomafix and Kodak Photo-flo.
Rodinal is a very very cheap one-shot (means you pour it out the sink when done) developer with an amazing shelf life. It’s said that they can be stored for up to 40 years without any problems.
After having developed, you need a stop bath. Stop baths are actually just acidic solutions and nothing more. You can either add some “ättiksprit” as it’s called in Sweden to some water and be done with it. If you live somewhere where they don’t sell ättiksprit (vinegar essance according to Google), you can make an acidic stop bath out of regular tap water and a bunch of citric acid. Be on the lookout though, it can start to grow mold!
For the fixer, I’m really happy with Fomafix, from the same people that made Fomapan. It has a shelf life of about a year and is very cheap per use.
You only use about 2-3 drops of the Photo-flo per development. It will make sure your film dries well and doesn’t leave water stains. It’s worth it.
Step 3 - DIY film scanner⌗
Well, now you’re shot and developed your photos, but what are you going to do with them?
The best would of course be a darkroom where you can make analogue prints from all your photos. This will be quite expensive if you’re a total noob. If you’re serious about photography, I’m sure you already have a somewhat decent digital camera laying around that you used before getting into film.
We’re going to use that to build this:
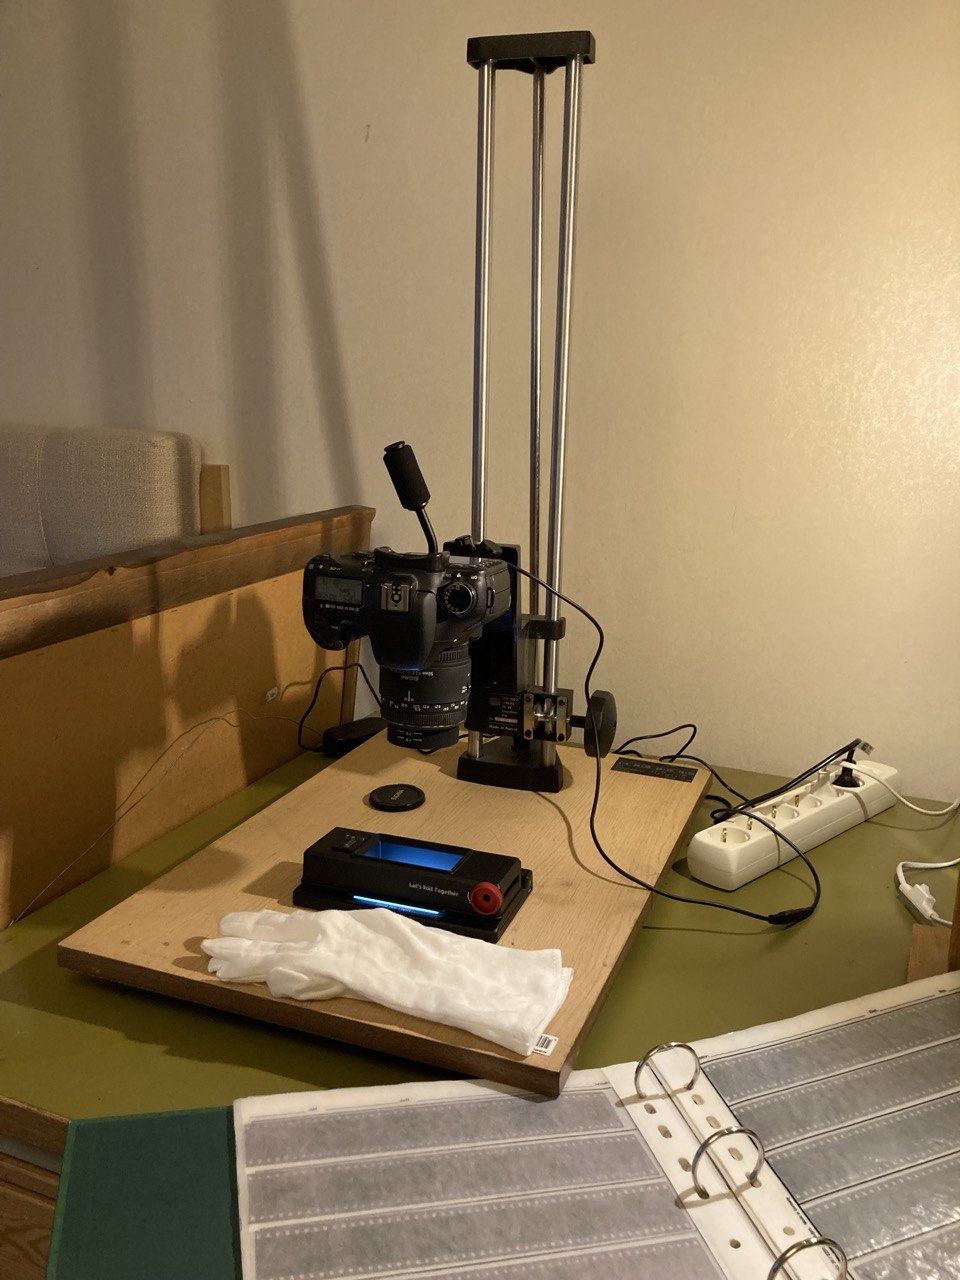
This is the skeleton of an old enlarger I found at a thrift store for about €15. Onto it, I attached a €18 tripod head with a 1/4th inch bolt. I mount my camera onto the tripod head and I can then adjust all settings I need. The wheel on the right makes it possible to change the height of the camera to match your negative.
For this, I also had to buy a macro lens that worked for my camera. I decided on an old Sigma lens for the Nikon mount (with an adapter ring for my Canon DSLR) that cost me about €80.
To add a bit more cost, I use the Lomography DigitaLIZA PLUS. It’s a small light table with holders for medium format, 127 and 35mm film. It’s built well and works wonderfully for scanning at home.
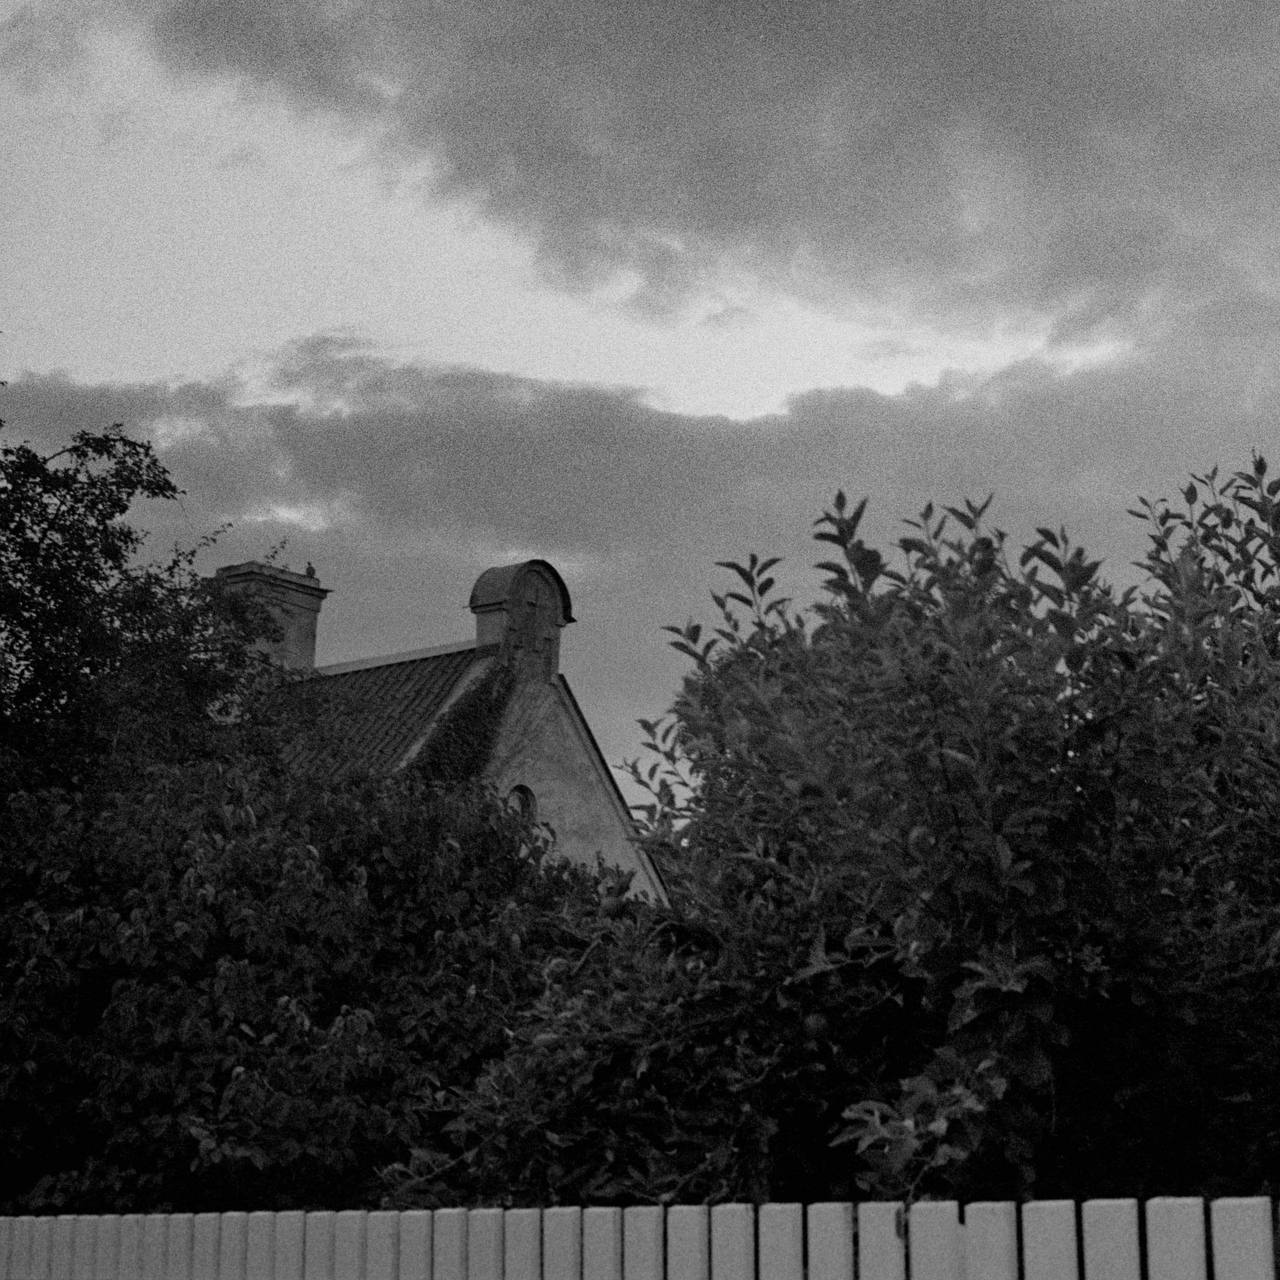
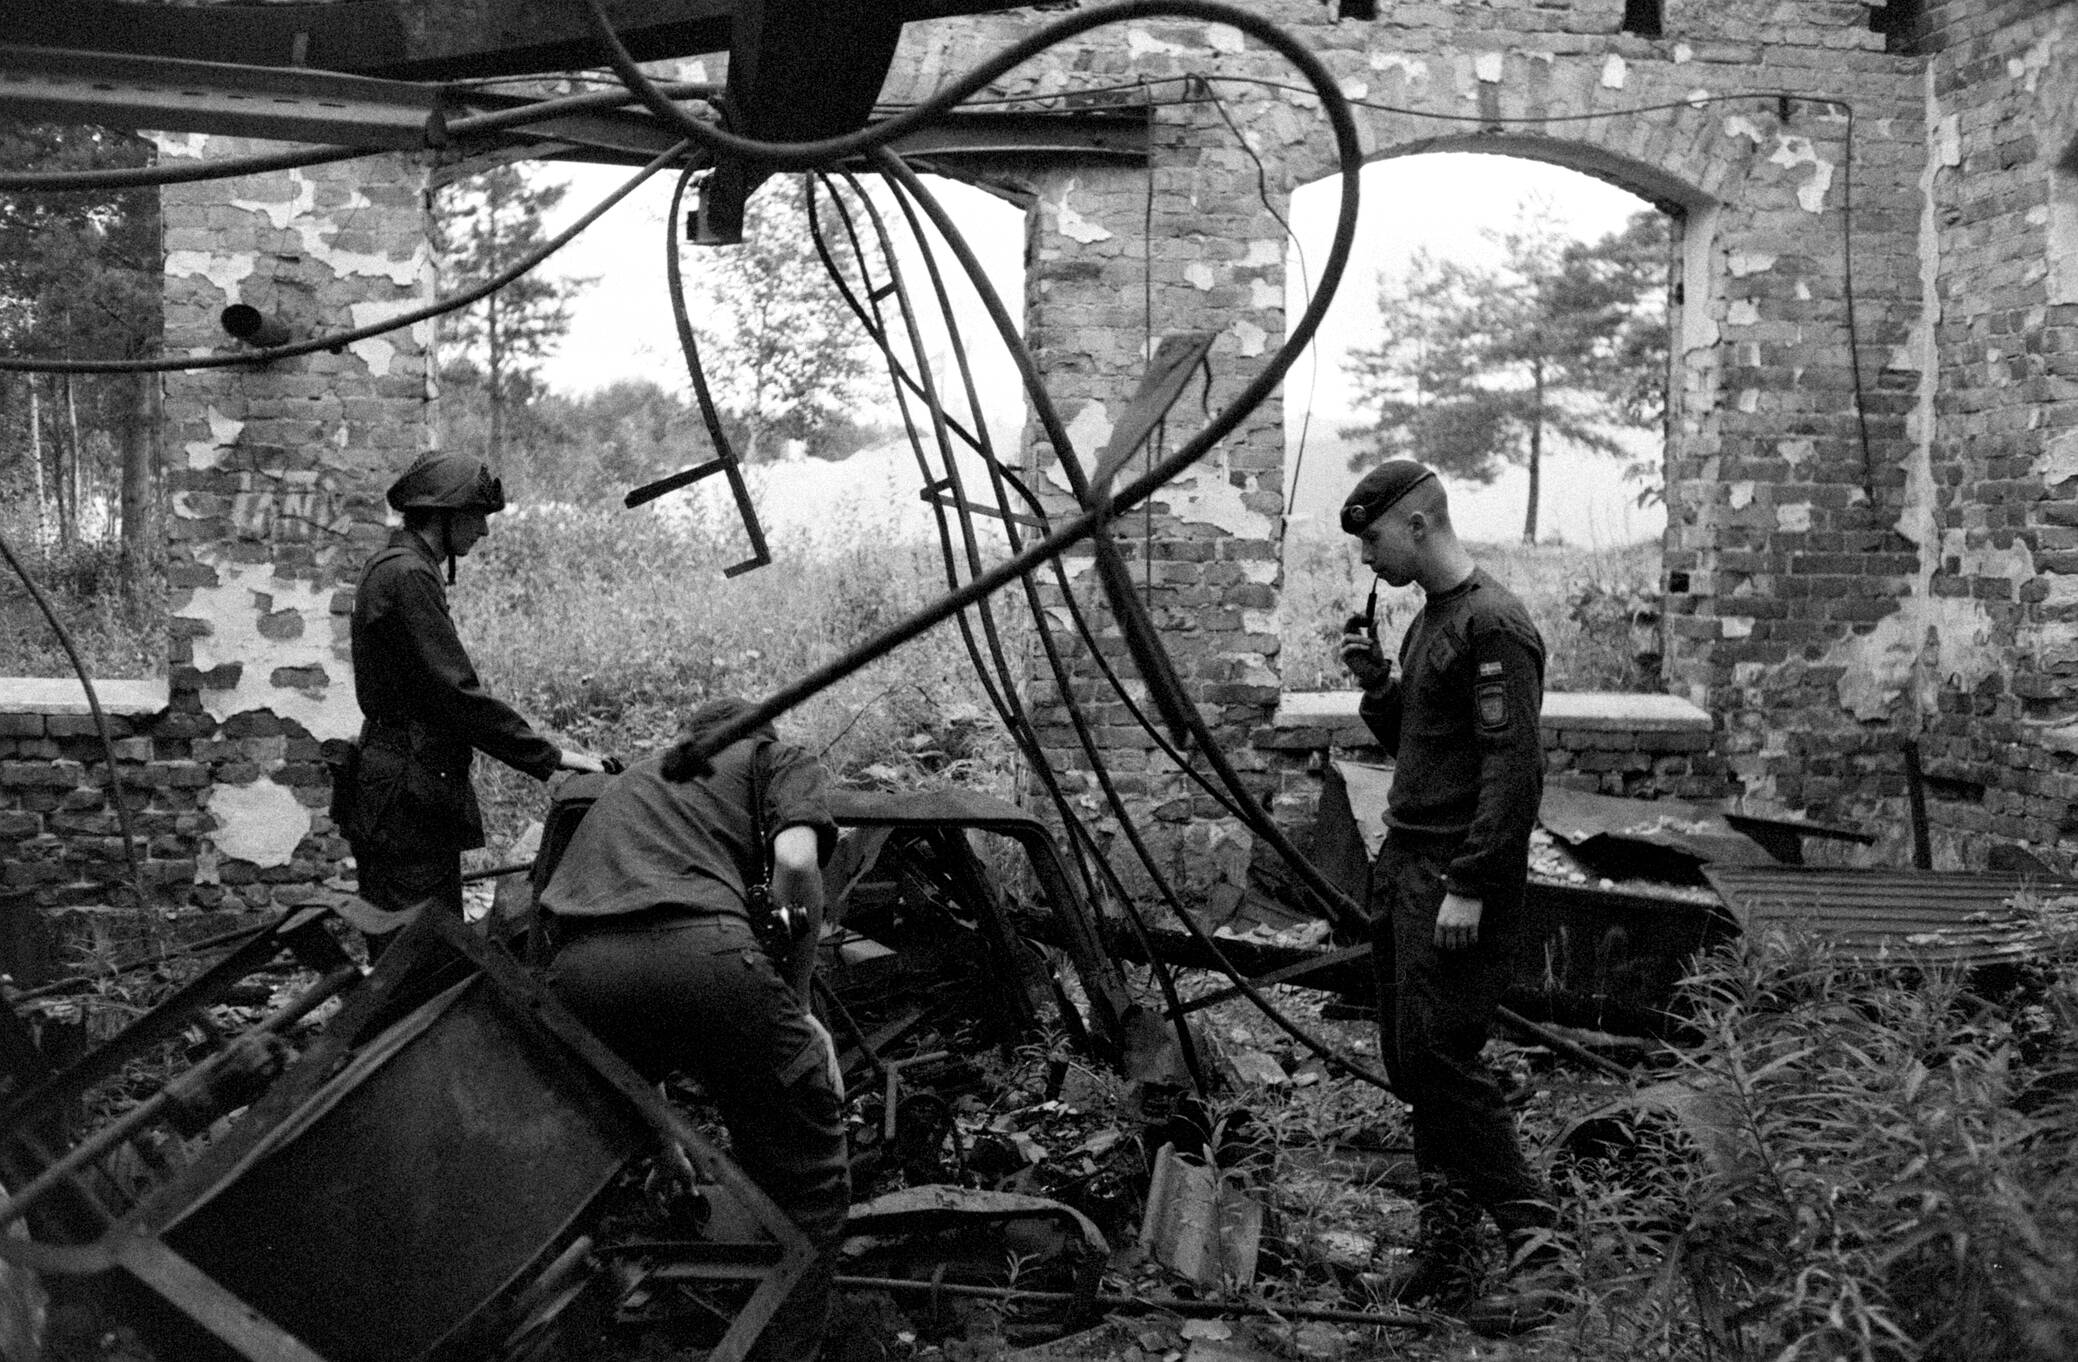
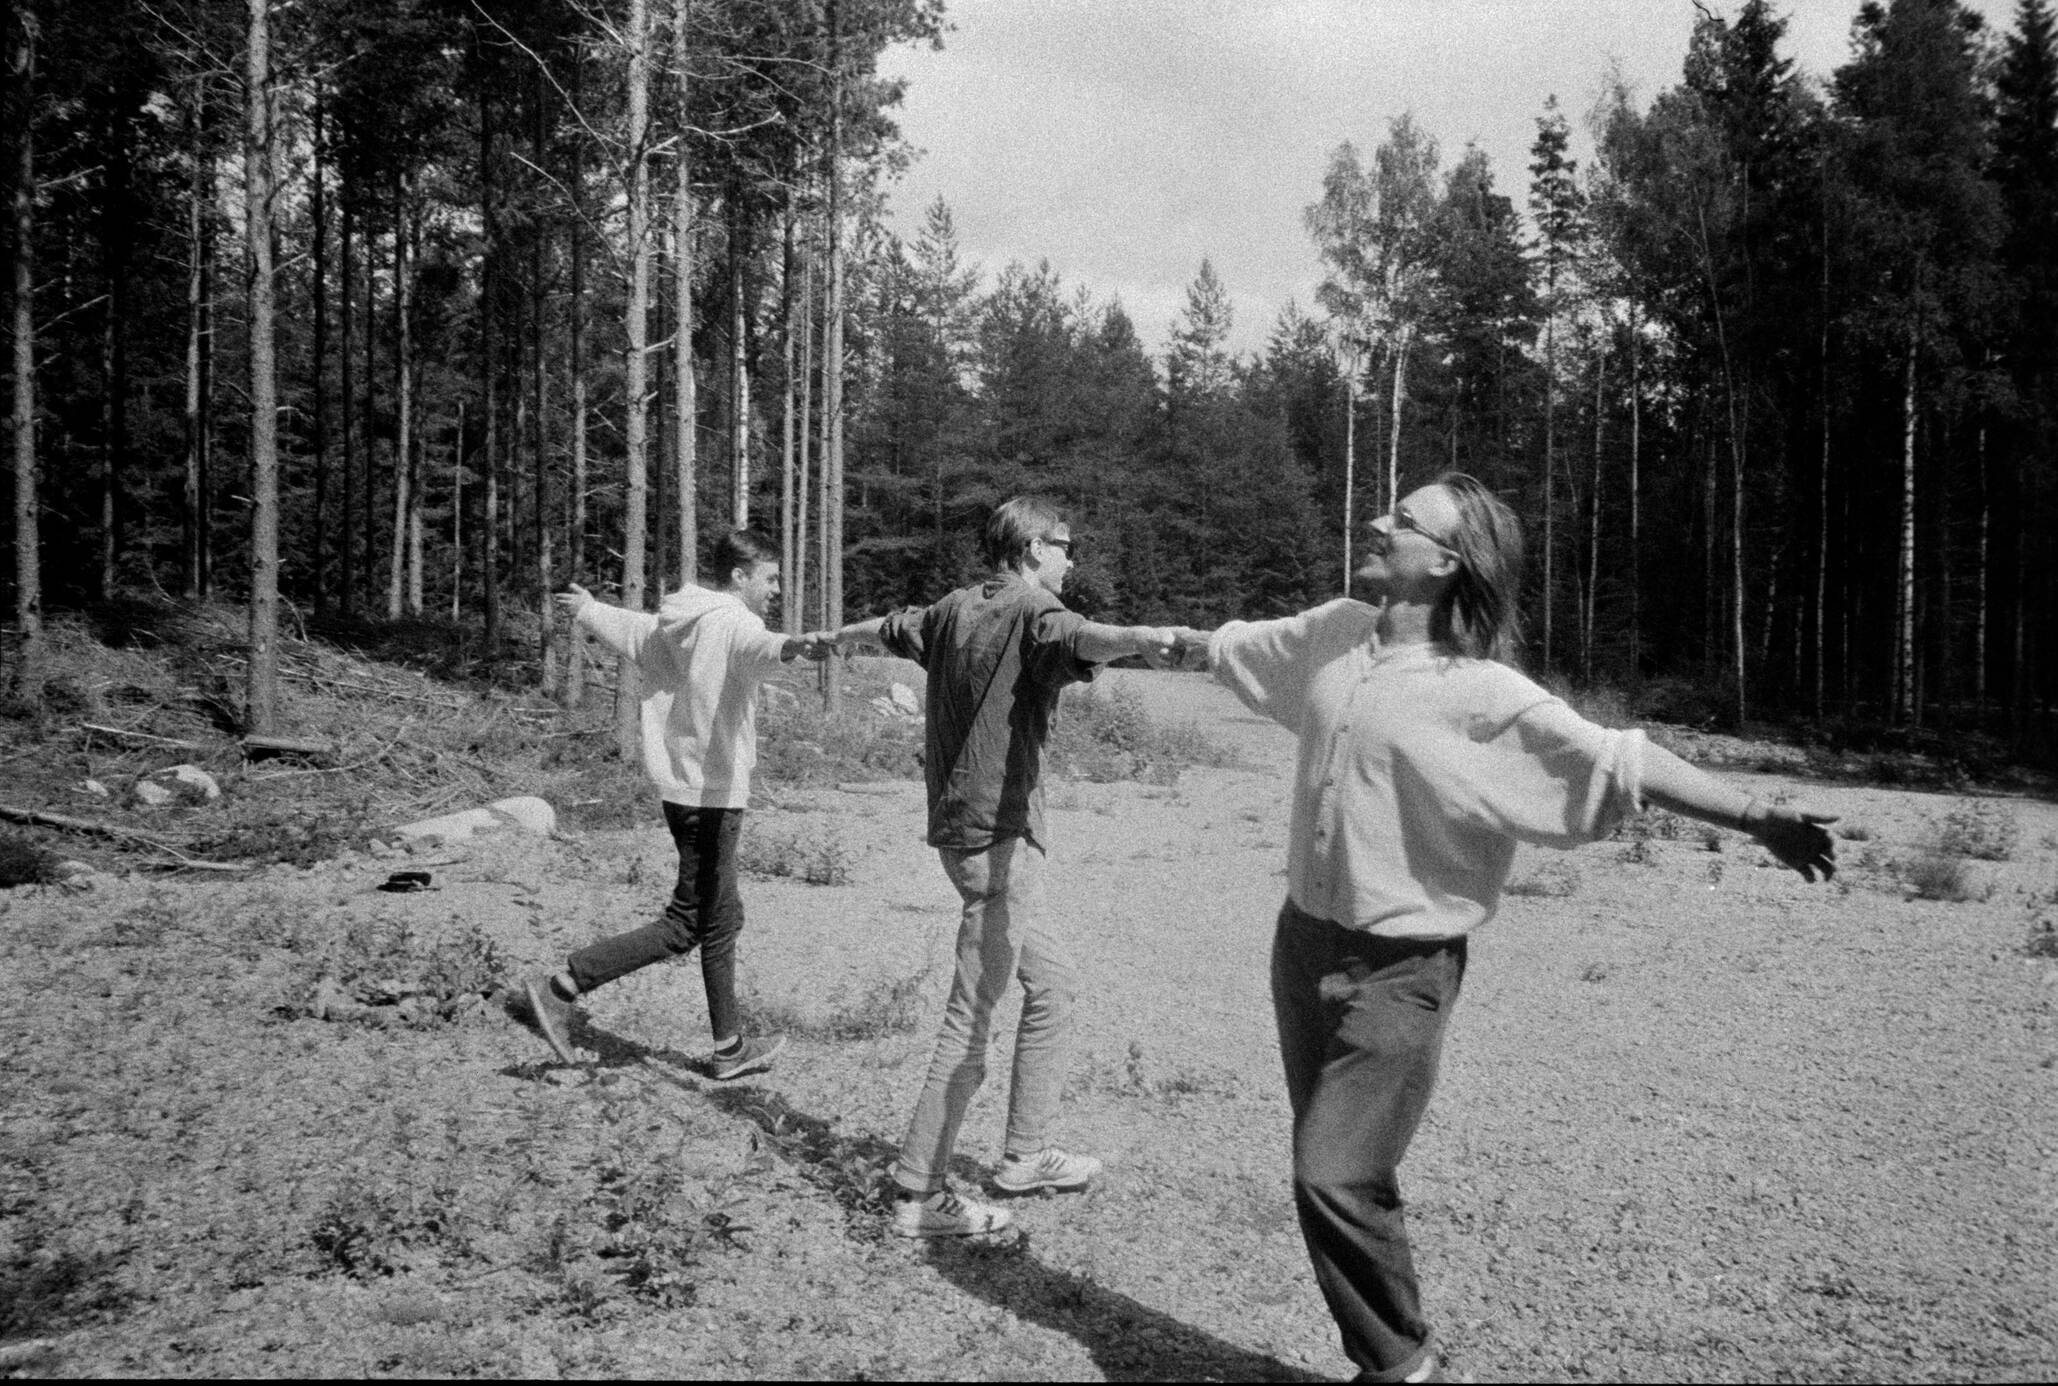
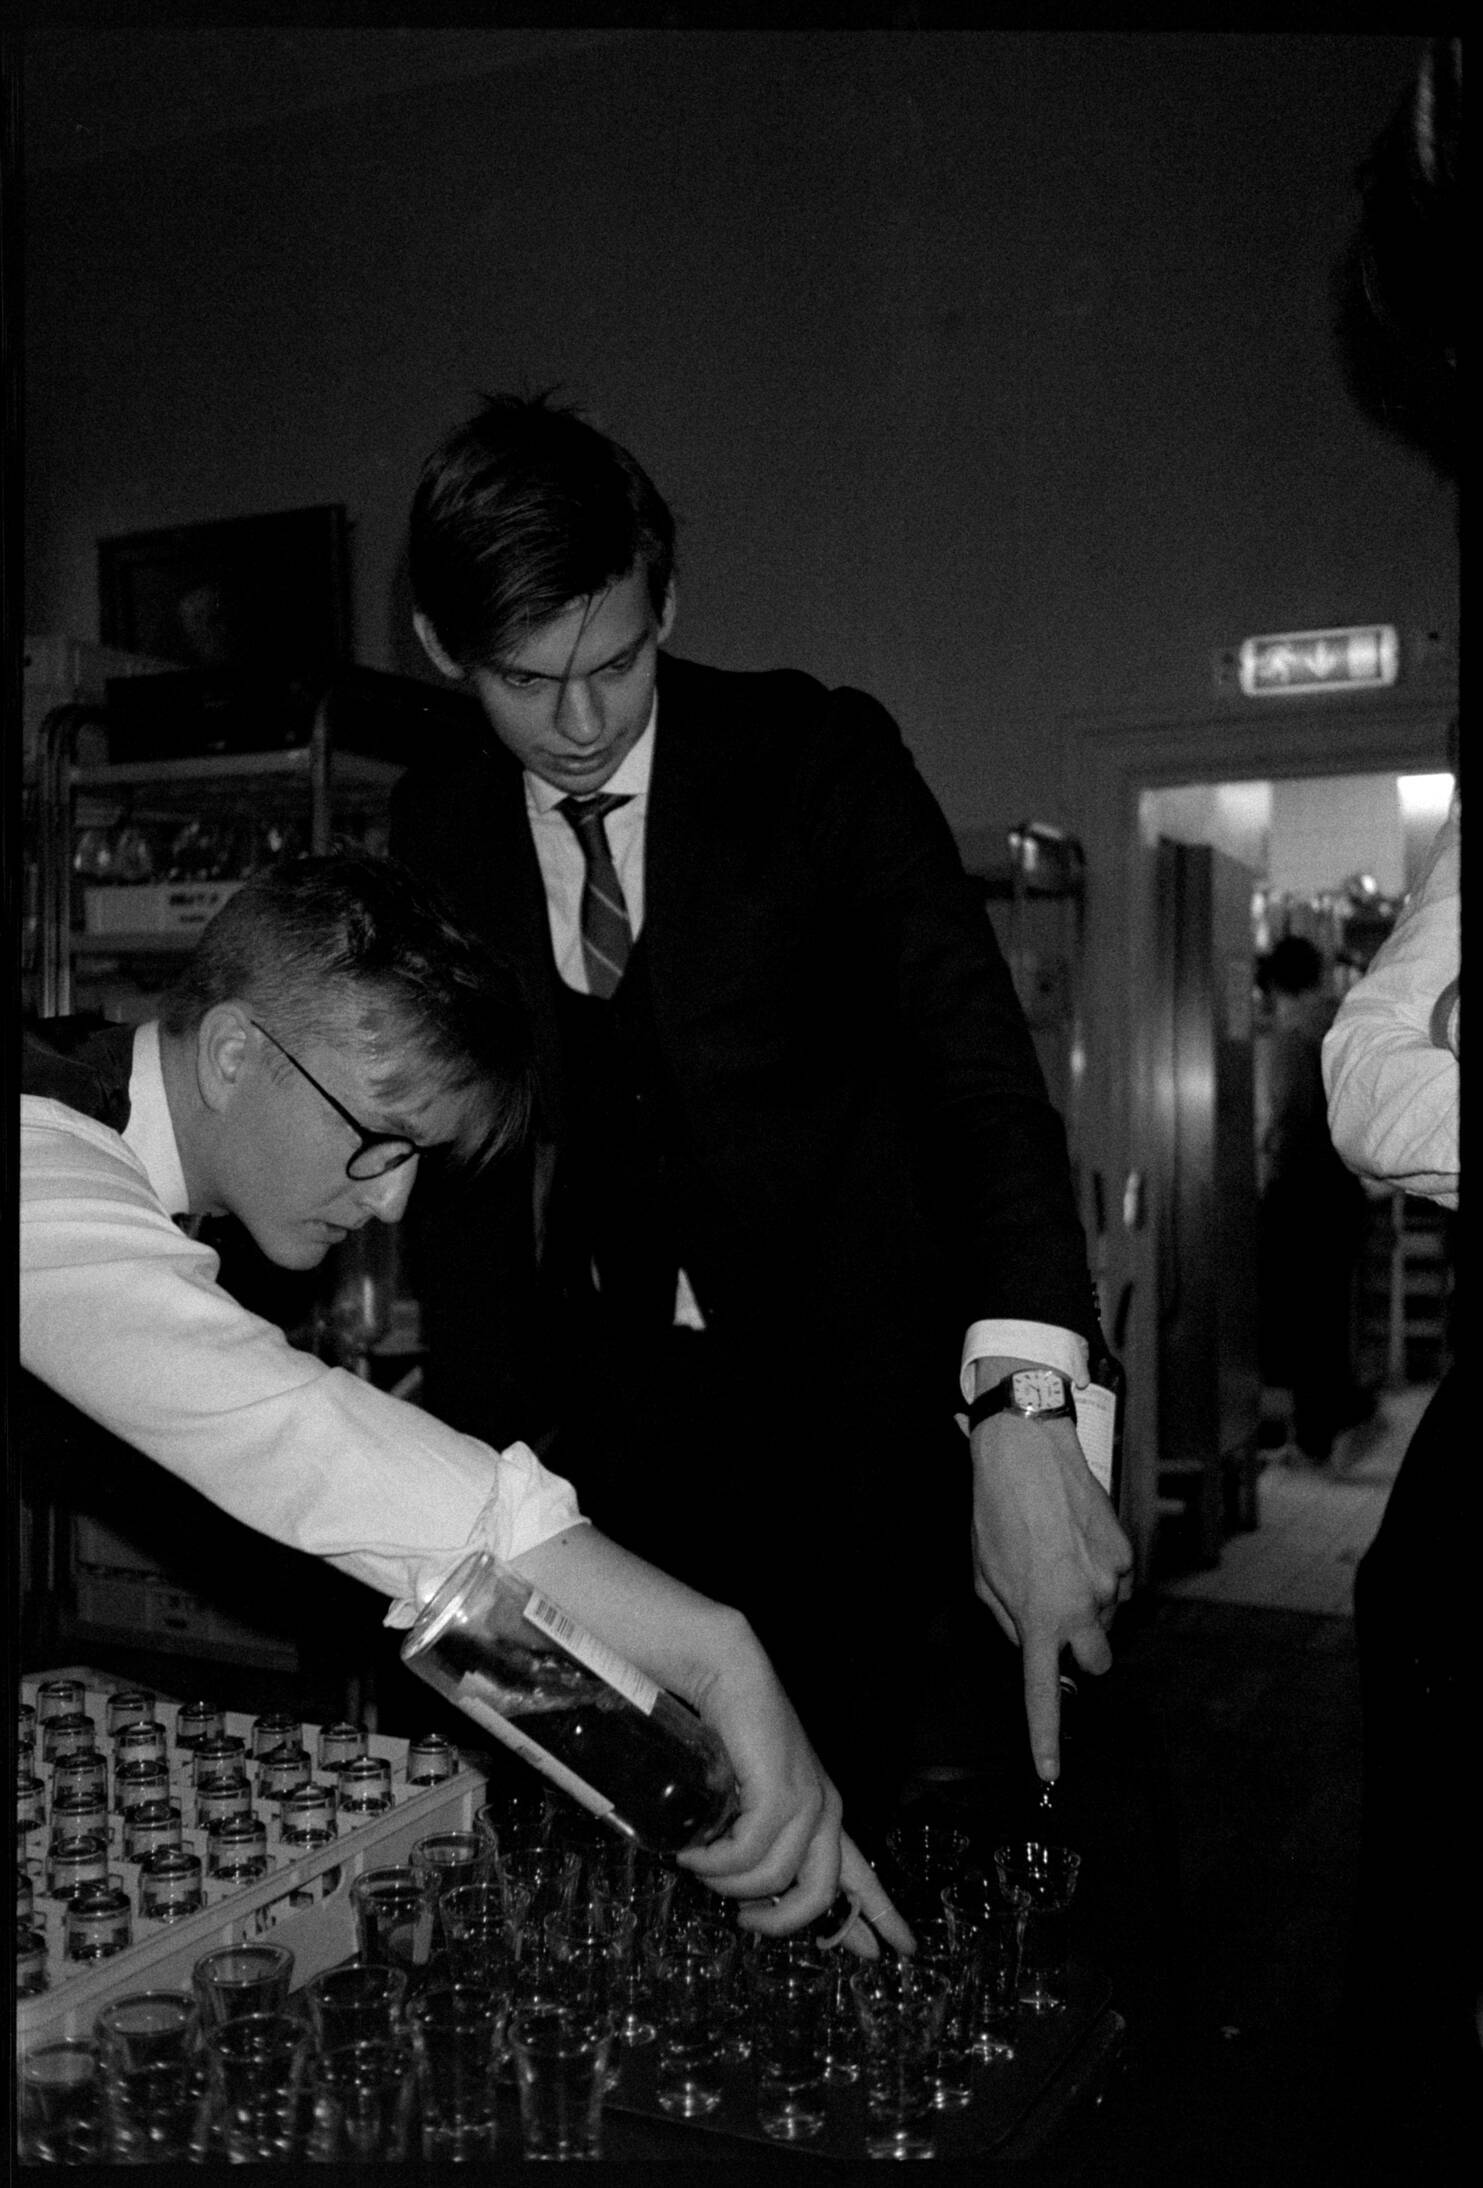
I’ll add a few sample shots taken with bulk rolled film, developed in cheap chemicals and scanned with the DIY scanner.
Sample shots —⌗
taken on bulk rolled film, developed in cheap chemicals and scanned with the DIY scanner⌗