Suzuki Press Van-120

Table of Contents
Introduction⌗
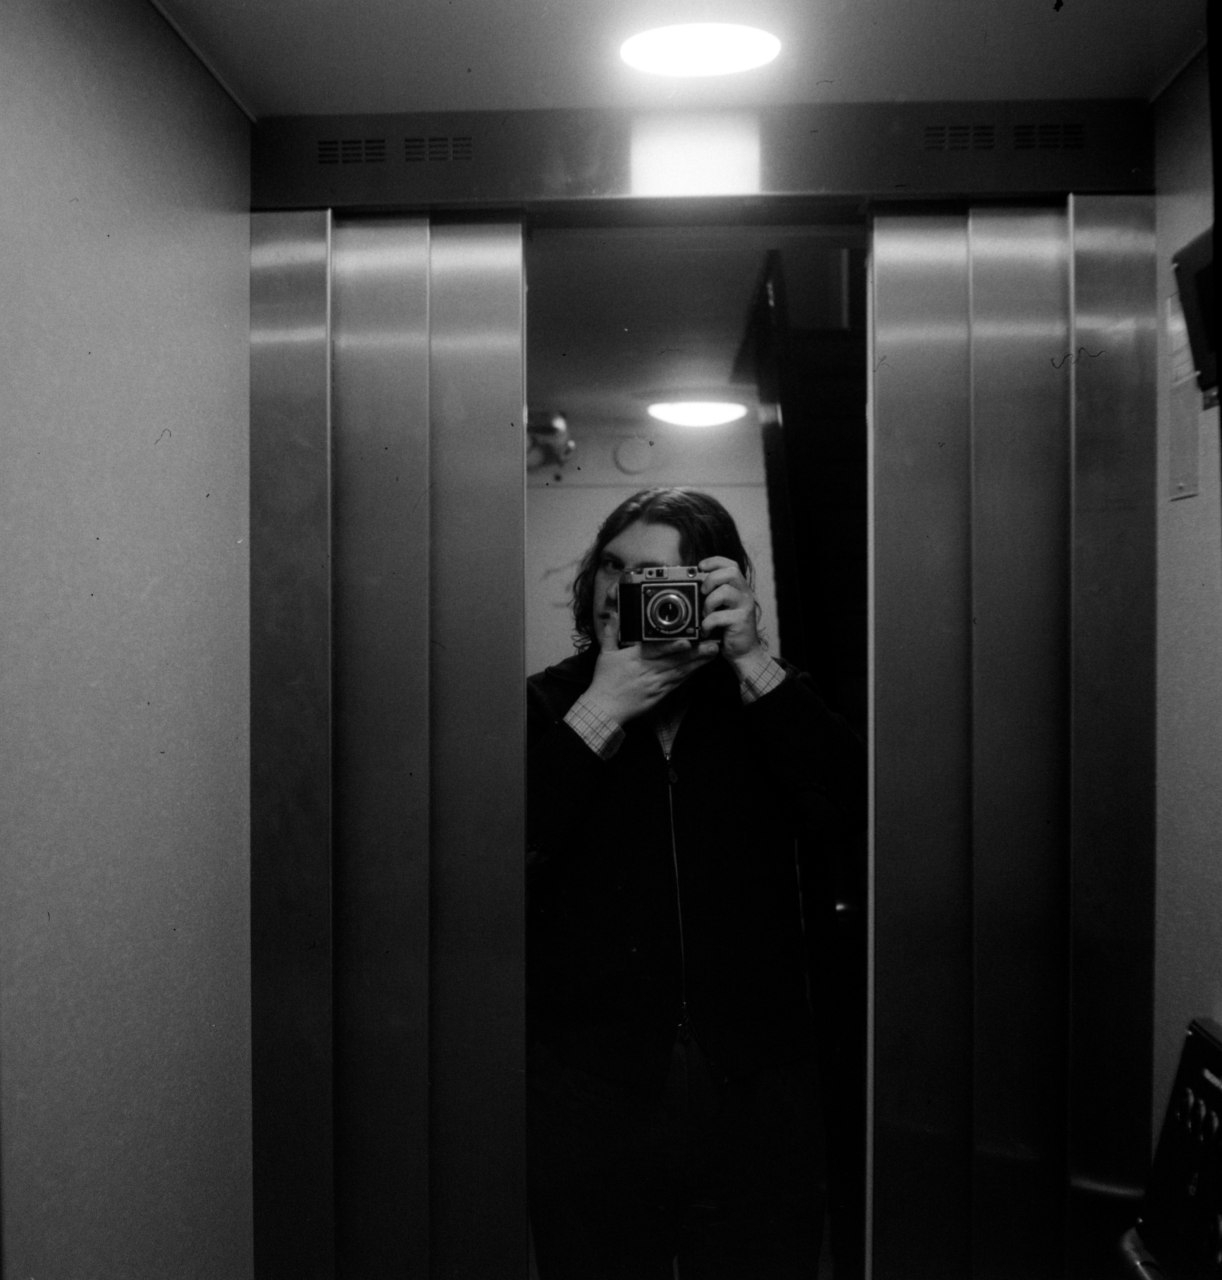
To introduce myself quickly, the name’s Erik and I’m into analogue photography. This will be the first post on this blog, hopefully of many. You can find my portfolio here.
I bought the camera in question on eBay for about 260 euros. Finding one within Europe is very hard and I threw myself over the purchase button as quickly as I could. If you want to know more about the camera’s history and background, I strongly advise you to read Mike Eckman’s blog post about it, which you can find here.
History⌗
Despite its name, it has nothing to do with the very famous company Suzuki, of which I’m sure you’re already aware. Maker or motorcycles and a lot more.
Suzuki is a very common surname in Japan. The creator of this camera, Ryohei Suzuki, worked as a lens designer at what was then called Asahi. You probably know it as Pentax. When his idea of a medium format press camera didn’t spark their interest, he decided to start the Suzuki Optical Company which manufactured the Suzuki Press Van and the Press Van 120.
Like I said, I strongly advise you to read Mike Eckman’s blog post about it. He and I don’t have the same version, as the camera was released in two different editions. The camera he reviewed was the original Suzuki Press Van whereas I’m in possession of the Suzuki Press Van-120.
Functions⌗
So — onto the functions of the camera. Like I said, there were two renditions of the camera. The Press Van and the Press Van-120.
Versions & format⌗
There are several differences between the two versions, with the main one being the format. While both are medium format cameras, the original one featured an insert that allowed you to shoot 35mm as well as 6x6. The one I have, the Press Van-120, instead offers you 6x6 or 6x4,5. With the latter model they scrapped the idea of having a separate insert and instead provided built in flaps to allow for the 6x4,5 aspect ratio.
The original model also featured an automatic frame counter, which went out the window with the latter revision. In my model, you simply use the red window on the back.
To be able to distinguish which format you’re shooting, you rotate the pressure plate when loading the film. Rotating it makes sure that you can only see one of the numbers through the red windows when advancing the film.
Lens, aperture and shutter speeds⌗
Sharpness⌗
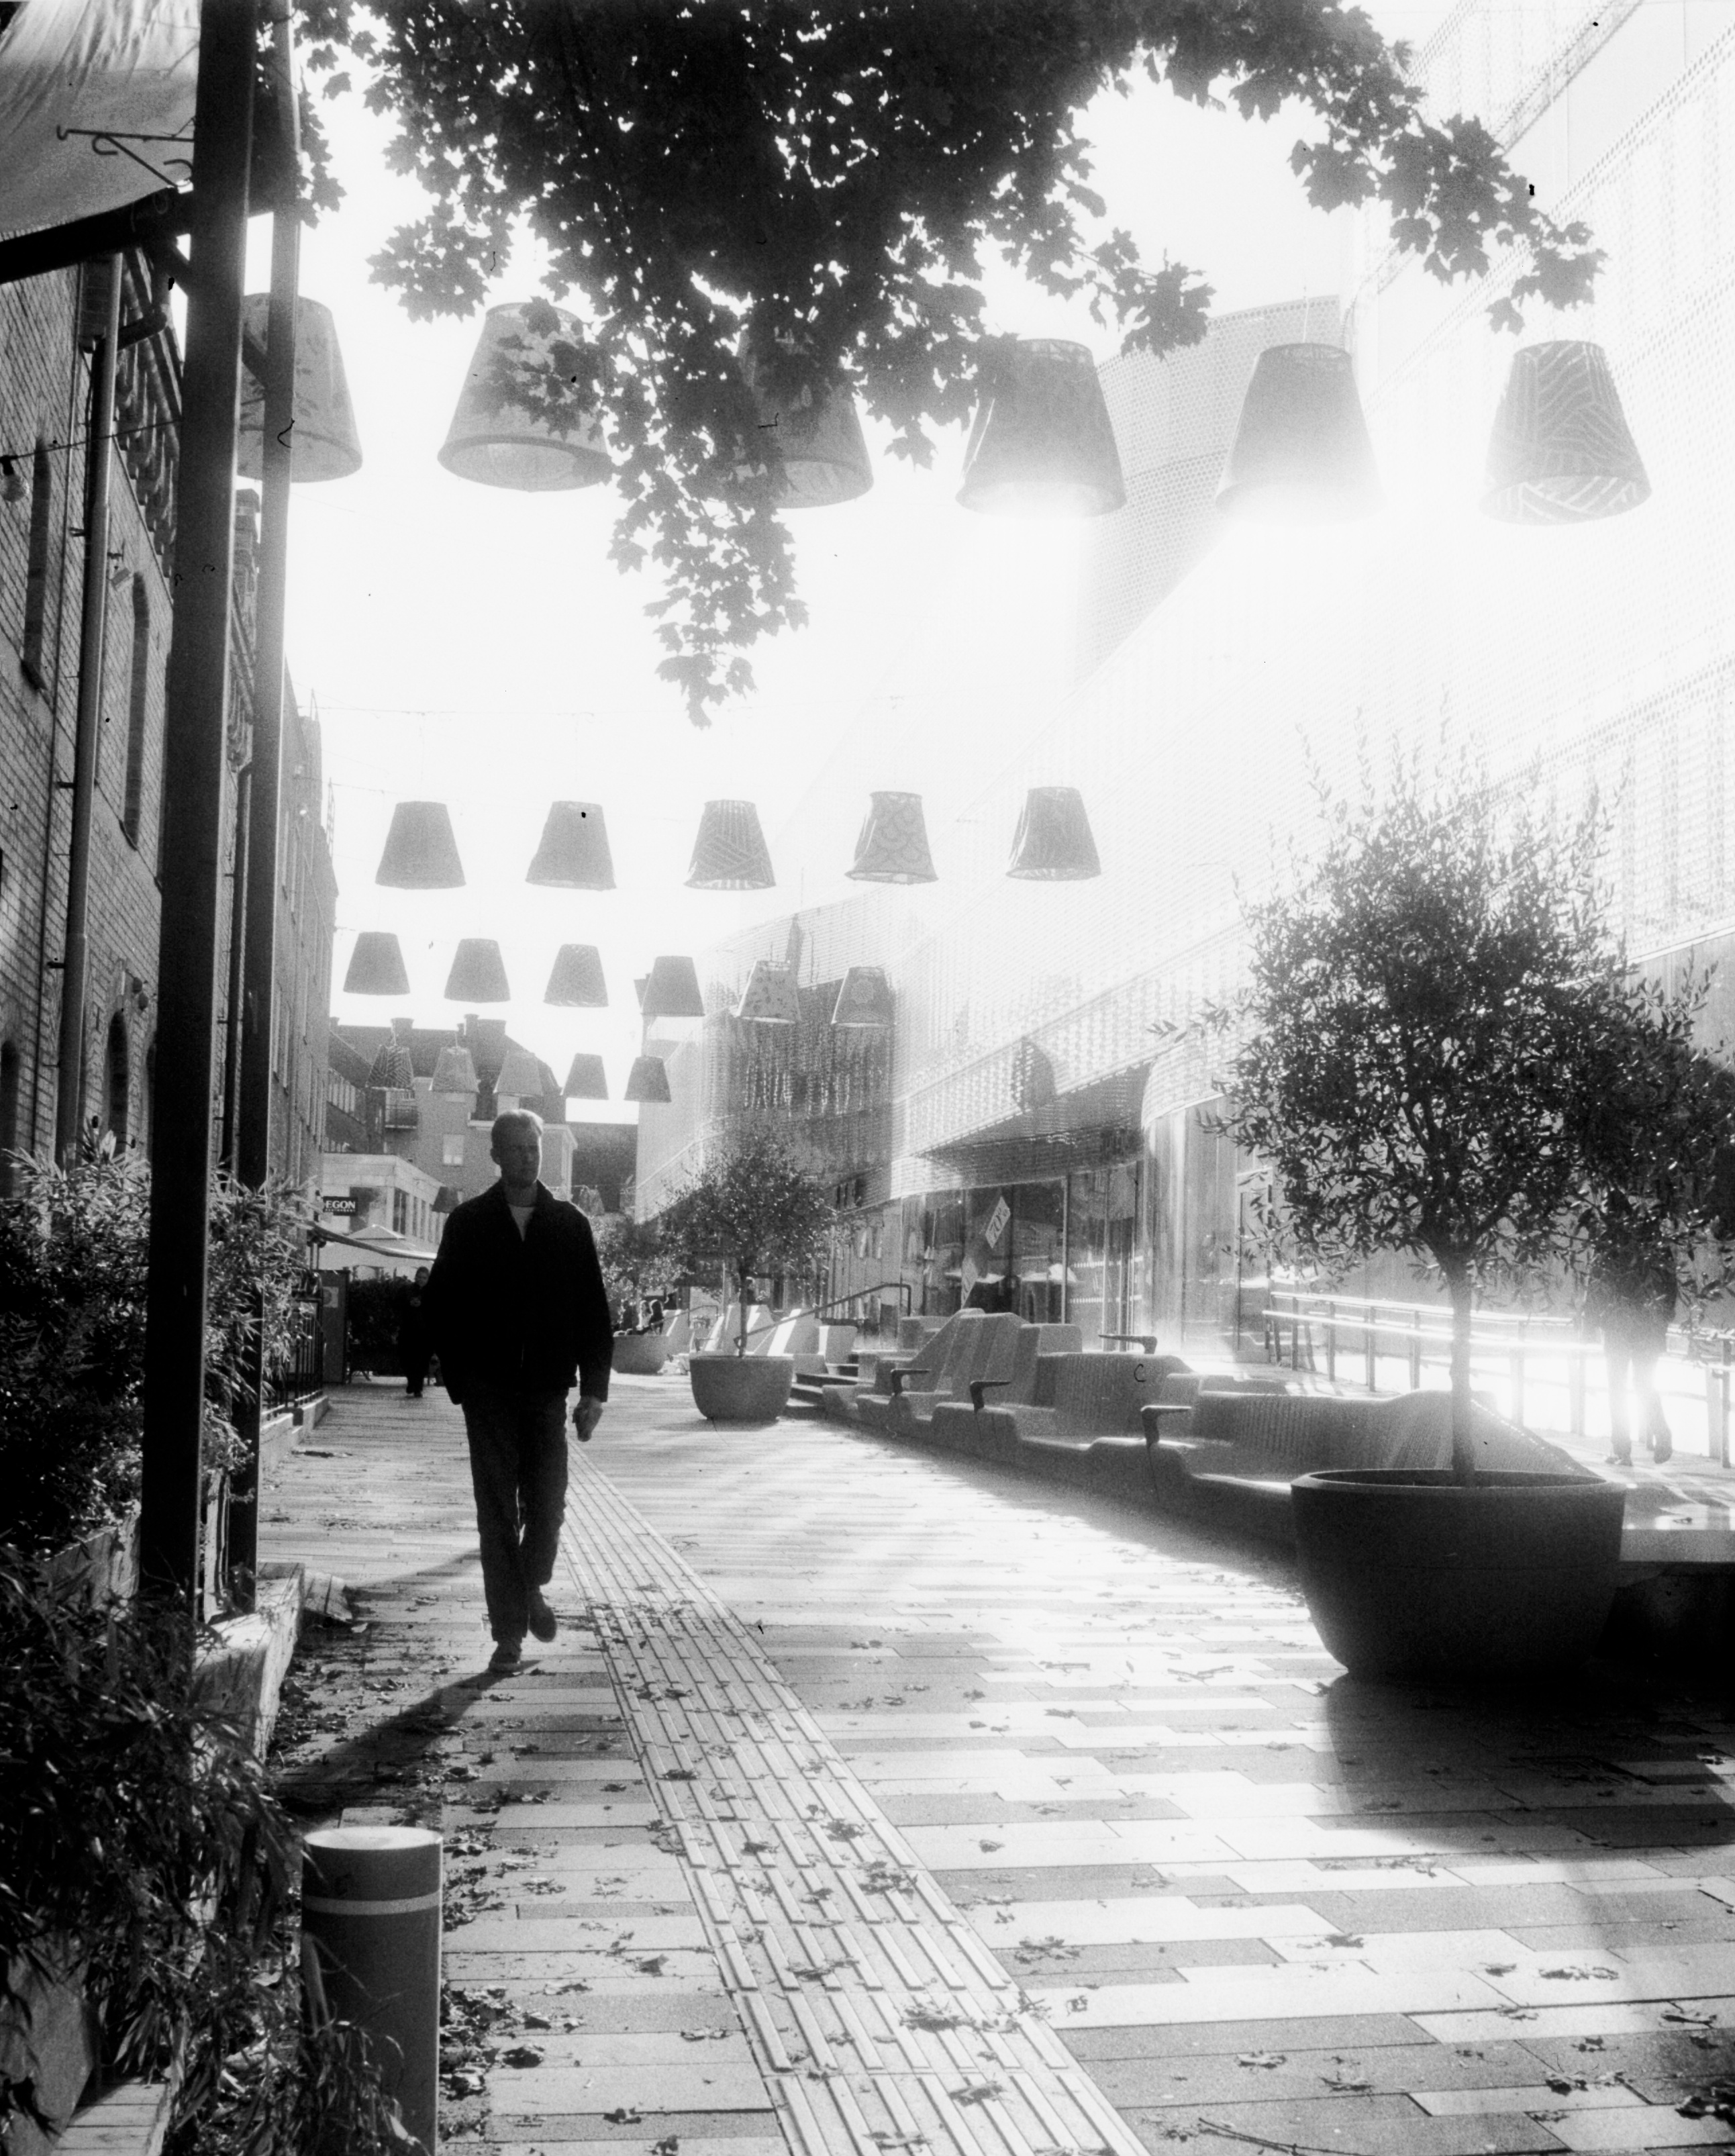
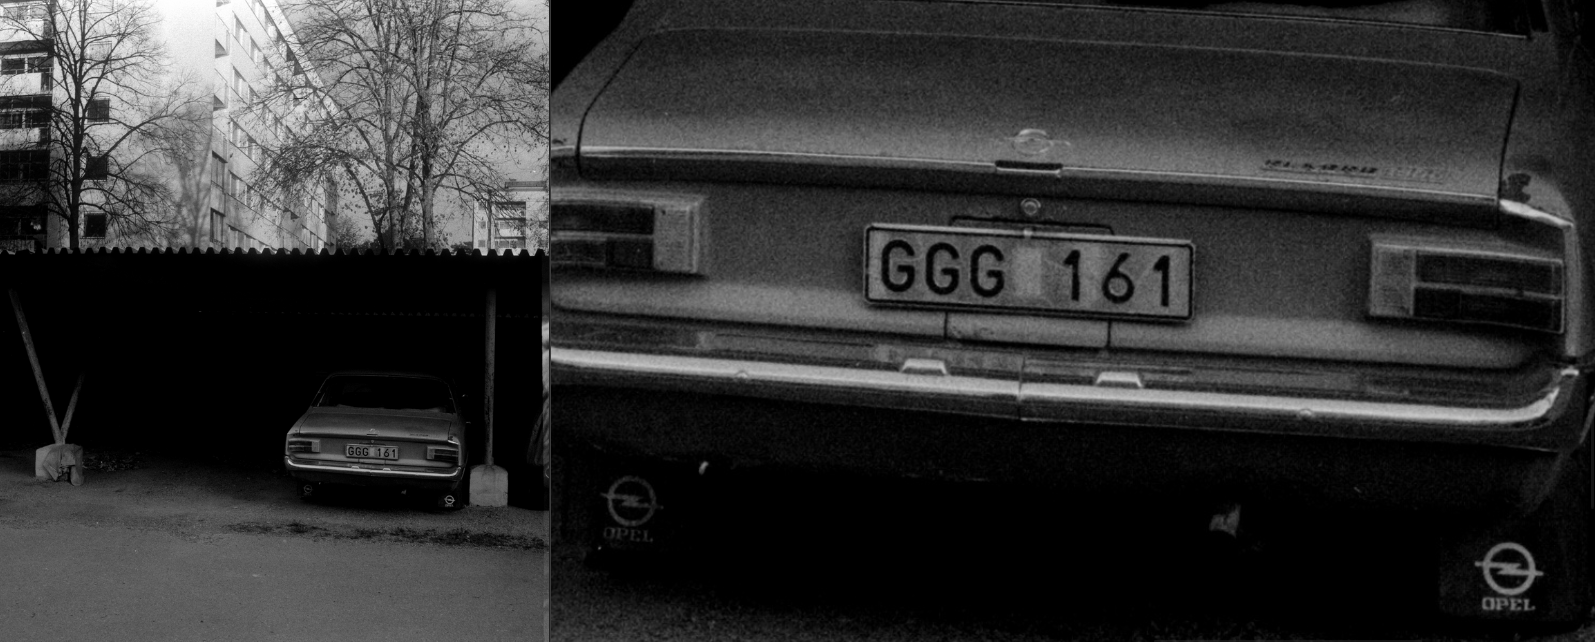
Equipped with an Asahi Takumar lens, the shots taken with it are quite stunning and impressively sharp. If there was one thing I’d praise this camera for, it’s probably the sharpness of the lens. I can’t really see any degradation of sharpness around the corners of the image, or anywhere really. To be quite honest, it’s just an overall amazing lens.
At 75mm, it’s on the wider end of the spectrum of “normal” focal lengths. Perfect for what I had in mind when buying the camera — having a medium format I can carry with me at all times and get most of what I want into the shot.
Aperture⌗
The lens starts at an aperture of an alright 3,5 and stops all the way down to 22. It remains sharp throughout the entire range. I have yet to figure out what its sharpest aperture is, as I tend to forget what settings I’ve used when shooting. One thing is clear however — it’s easy to get that famed “medium format look”.
A very important feature is that the aperture “ring”, if you can call it that, clicks. This means you can use the camera in what is essentially shutter priority mode. The shutter dial spins freely, but if you have a set shutter and need to adjust the aperture, you don’t have to actually look at the front of the lens to adjust it if you get used to where the stops are or in what order they come.
Shutter⌗
On the lens itself is not only the aperture control but also the wheel for setting the shutter speed as well as cocking the Seiko-made shutter. It goes from one second down to 1/500 and features a bulb mode as well. My camera struggles with the two longest shutter speeds, but works more than fine on all others.
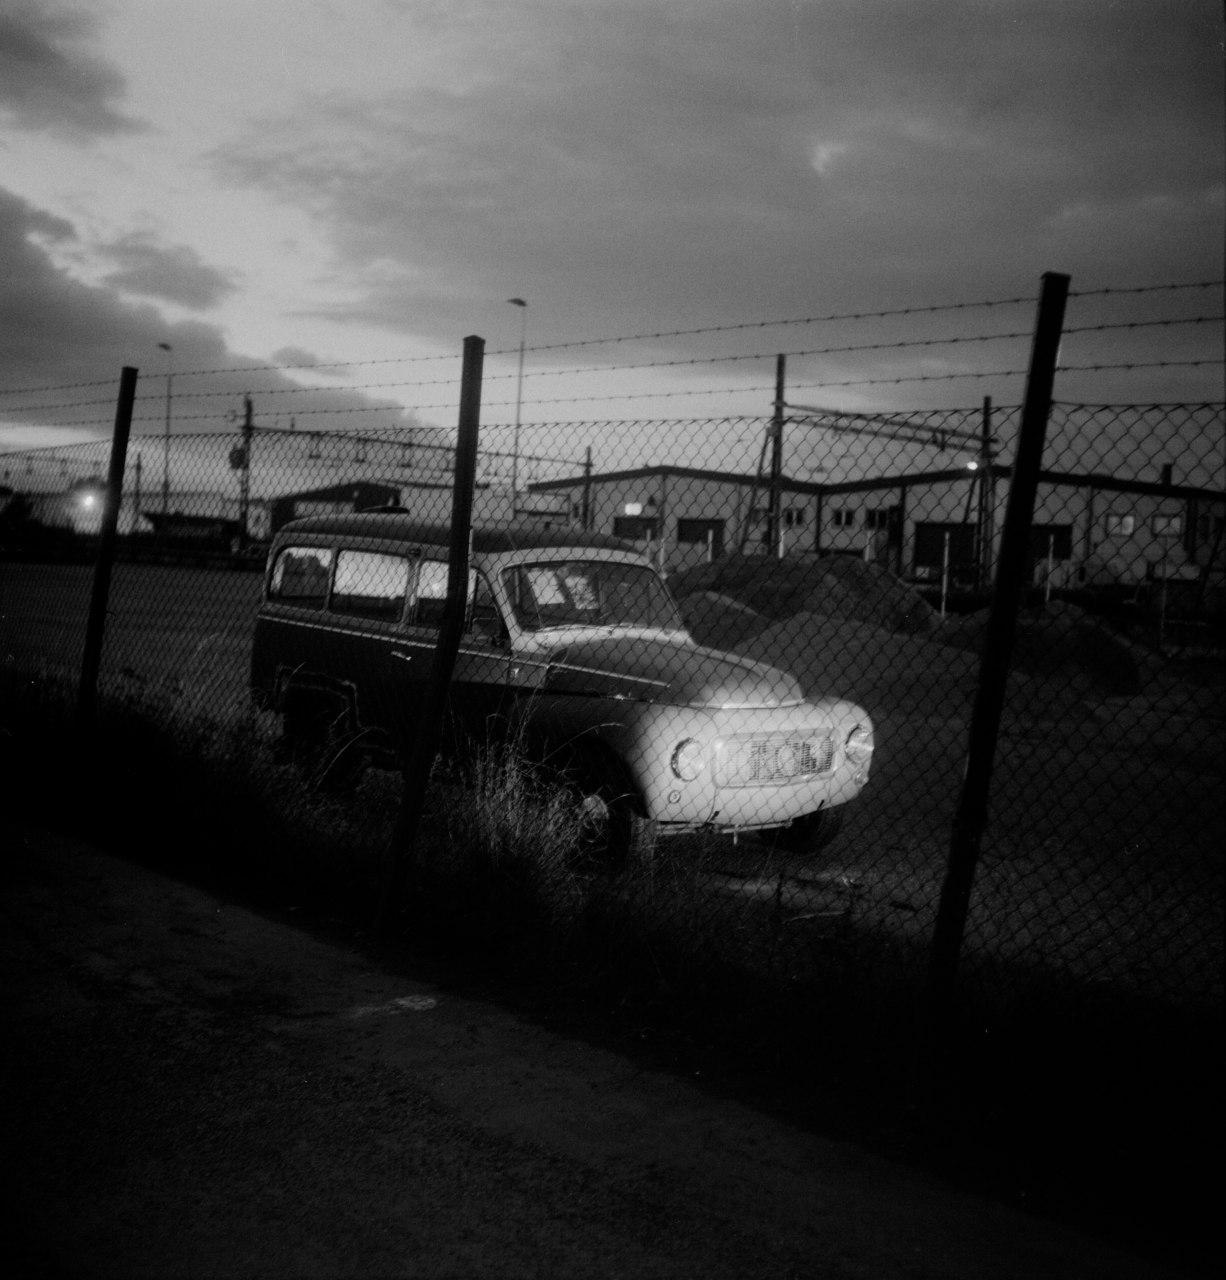
Thanks to having a leaf shutter, it’s very much possible to take images in lower light conditions, despite the lens only opening up to 3,5.
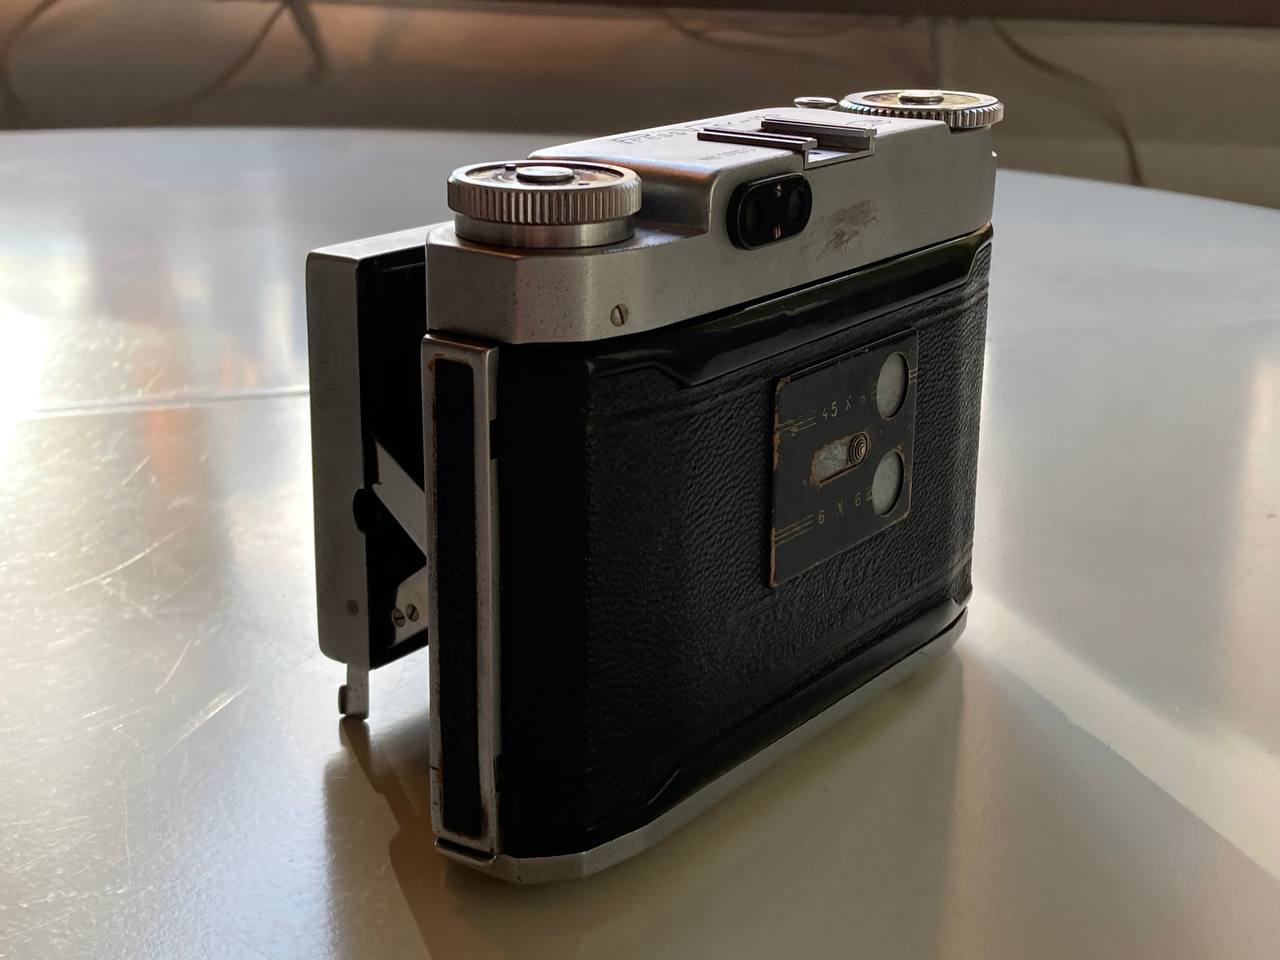
Viewfinder, rangefinder and focus⌗
As you probably noticed, there are three small windows on the front. This usually means that there’s an uncoupled rangefinder. That’s not the case here, though. The rangefinder mechanism is coupled, but the rangefinder and the viewfinder are separated. This is apparently much like older Leica cameras.
Rangefinder⌗
Focusing is very easy due to the clear rangefinder patch, both in daylight and low-lit conditions. Being separated allows for the rangefinder to be very zoomed in which provides you with an unparalleled ease of focusing.
The view around the rangefinder is tinted slightly blue whereas the rangefinder patch itself is tinted slightly pink. This makes the focusing a lot easier than it otherwise would’ve been.
Viewfinder⌗
My only wish is that the viewfinder had been a bit larger, as framing can sometimes take a bit of concentration. Since the camera shoots two formats, the viewfinder is also equipped with a 4,5 mask on the sides. I think it’s supposed to be kind of see-through. It’s yellowed with age on my camera and feels pretty pointless.
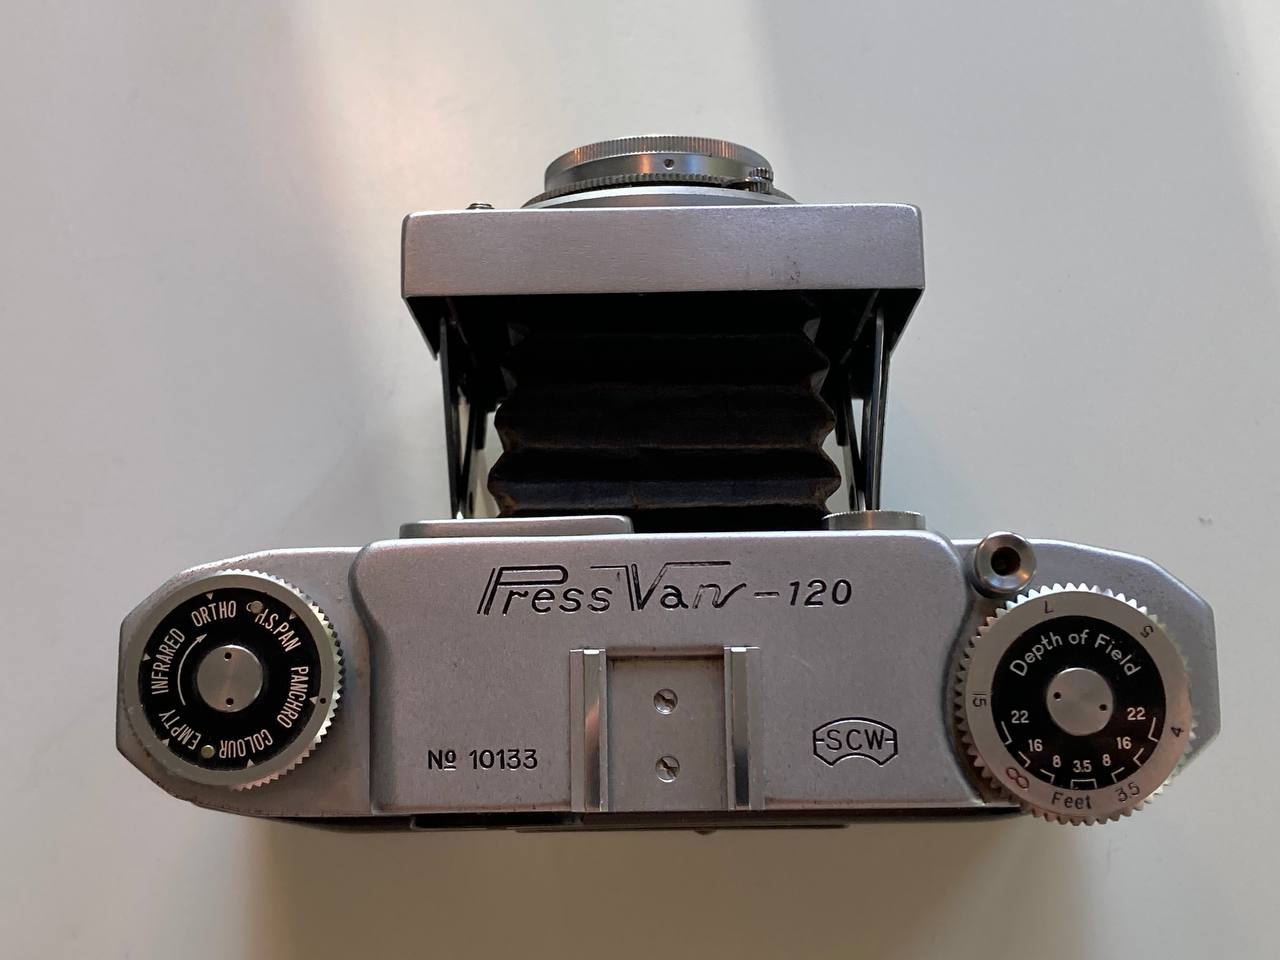
Focus dial⌗
To turn the focus, you turn the dial on the top right of the camera. It’s sadly marked in feet instead of metres. The knob to the left is just a reminder wheel for you to remember what kind of film you’ve currently got rolled up inside. It doesn’t actually affect any settings.
According to a video from Japan Vintage Camera on YouTube, a common problem with these is that the focus wheel gets stiff. Mine was when I bought it, but it was very easy to open it up and apply some lube to the mechanism. After I did, it’s very easy to focus. Zone focusing wouldn’t work very well for me, however, as I grew up with the metric system…
Feel and subjective opinions⌗
It might be the most important feature, sometimes overlooked in reviews. In my opinion, this camera handles really well. Having to first check focus in one window to then move on the frame in another can be quite annoying, but you get used to it pretty quick. If something happens where you really need to get the shot, you can always snap away while looking through the rangefinder window. After having put a few rolls through it, you get fairly accustomed to the difference in framing between the two windows.
Having the controls on the front of the lens can also be quite frustrating, but having the aperture “ring” click is a very welcome feature. If the shutter speed could also click, I’d almost give it a full score. Not that I’m keeping one.
My biggest gripe with it is that it’s not a folder camera. It has bellows that extend, but the lens element and the controls do not fold. This limits my ability to keep it in my pocket out of fear that I might scratch the lens element or that the shutter or aperture lever might get stuck in a loose thread.
Conclusion⌗
The Suzuki Press Van-120 is overall an amazing camera. If I could do the purchase all over again, I’d probably pick a folder over it to be able to keep it in my pocket. Now that I’ve bought it? I’m more than satisfied with it, especially the amazing quality of the lens.
Video⌗
I made a short video showcasing the features of the camera. It’s just two minutes long and with no speech. It showcases all the features that the camera comes with.
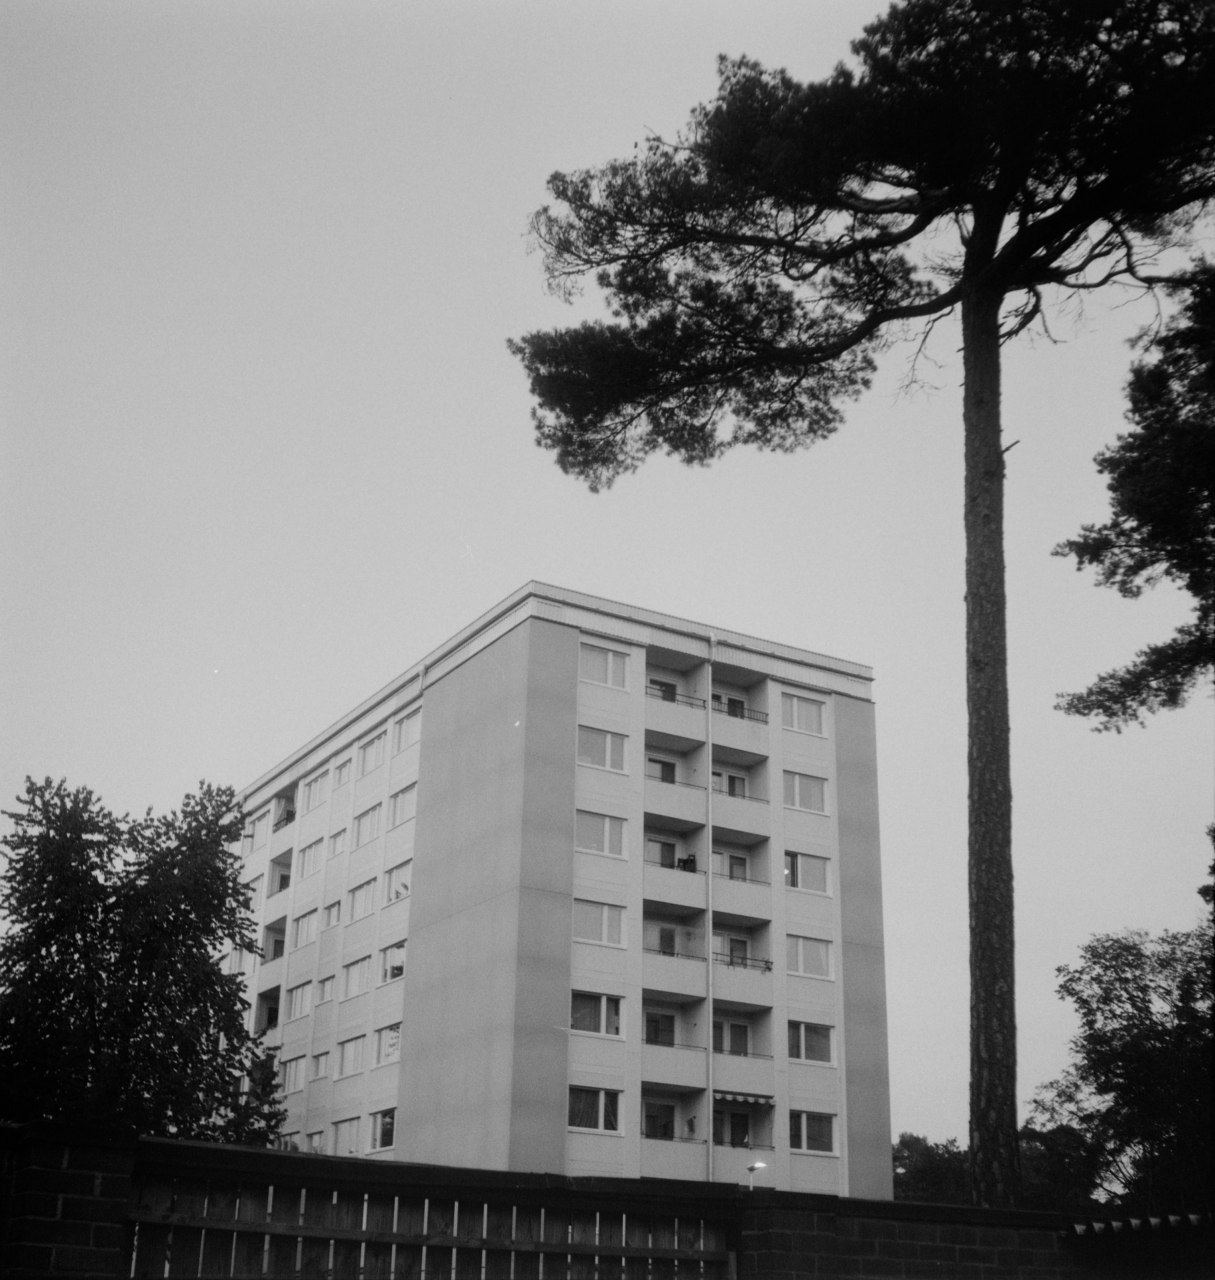
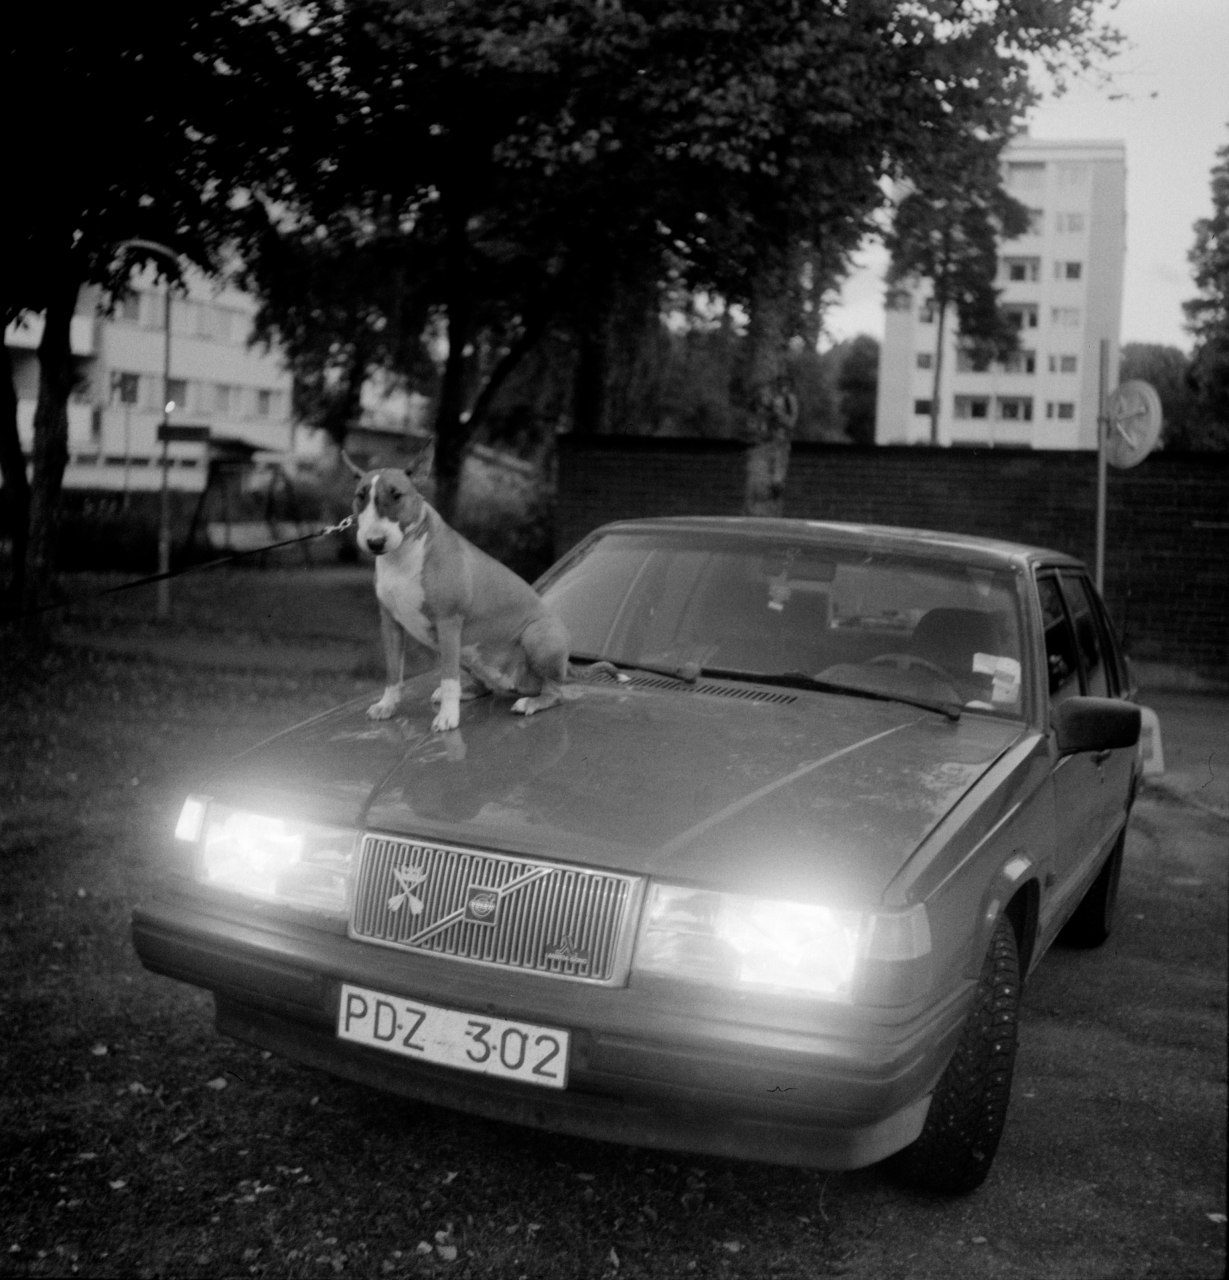
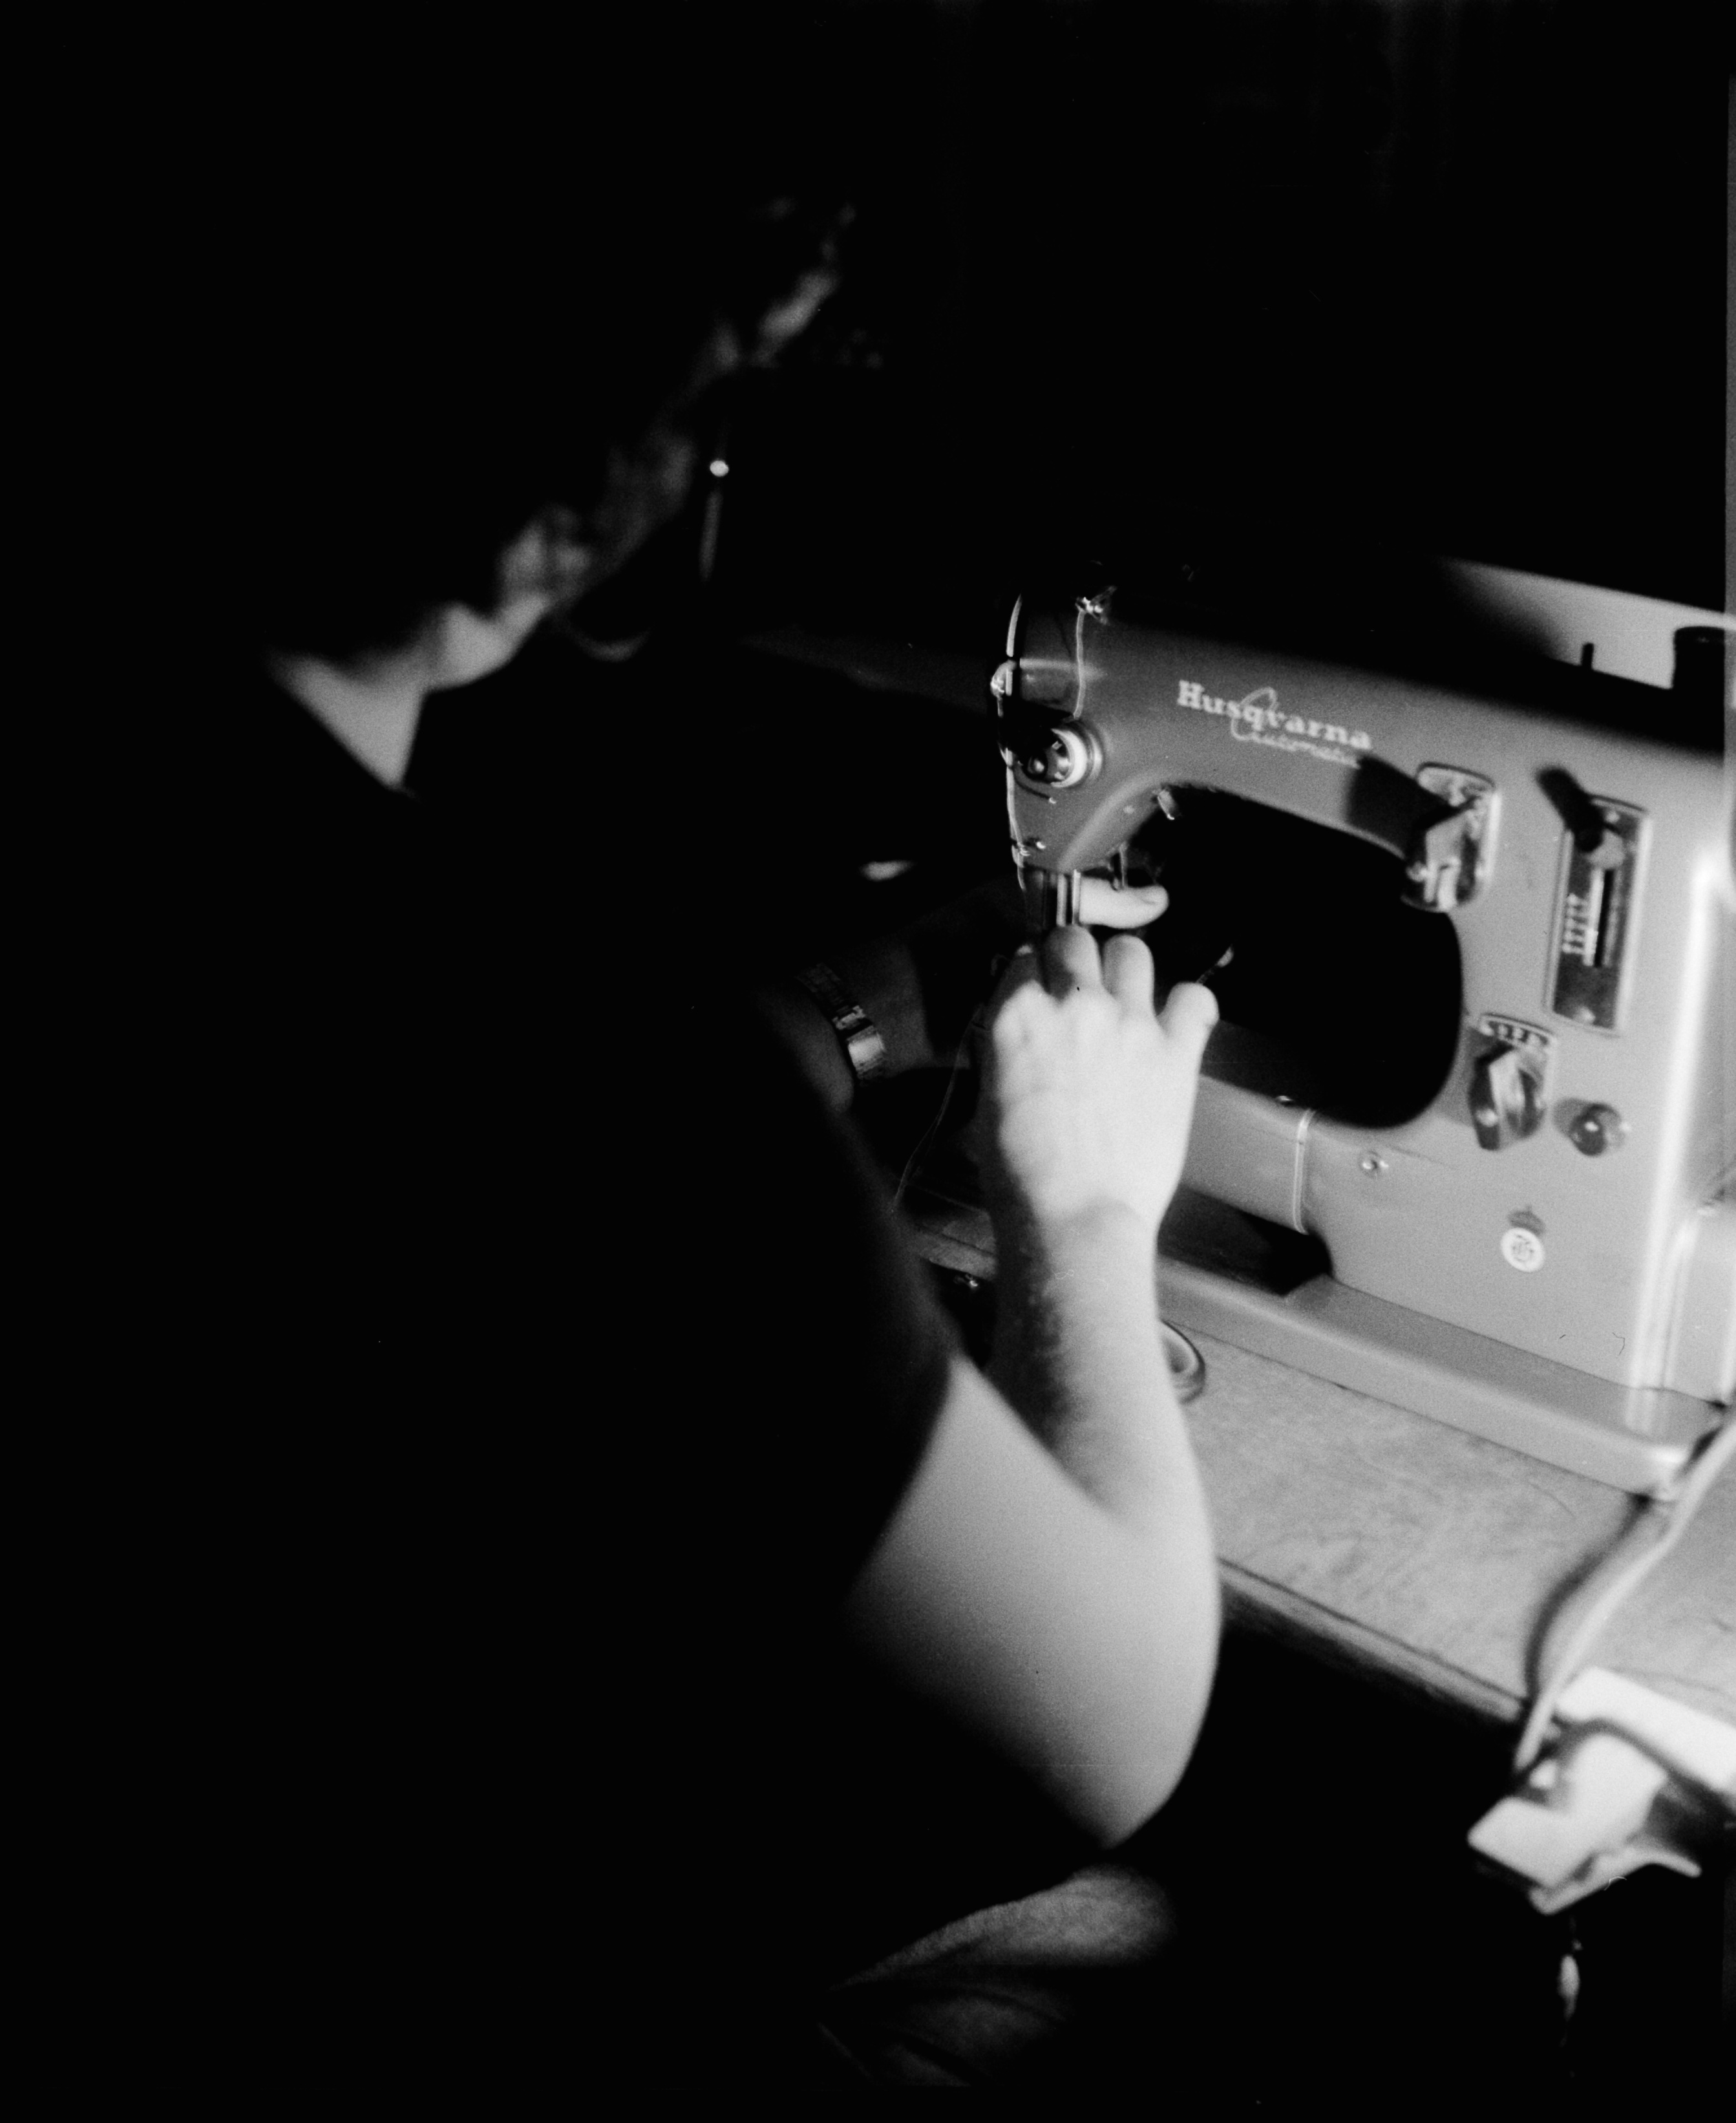
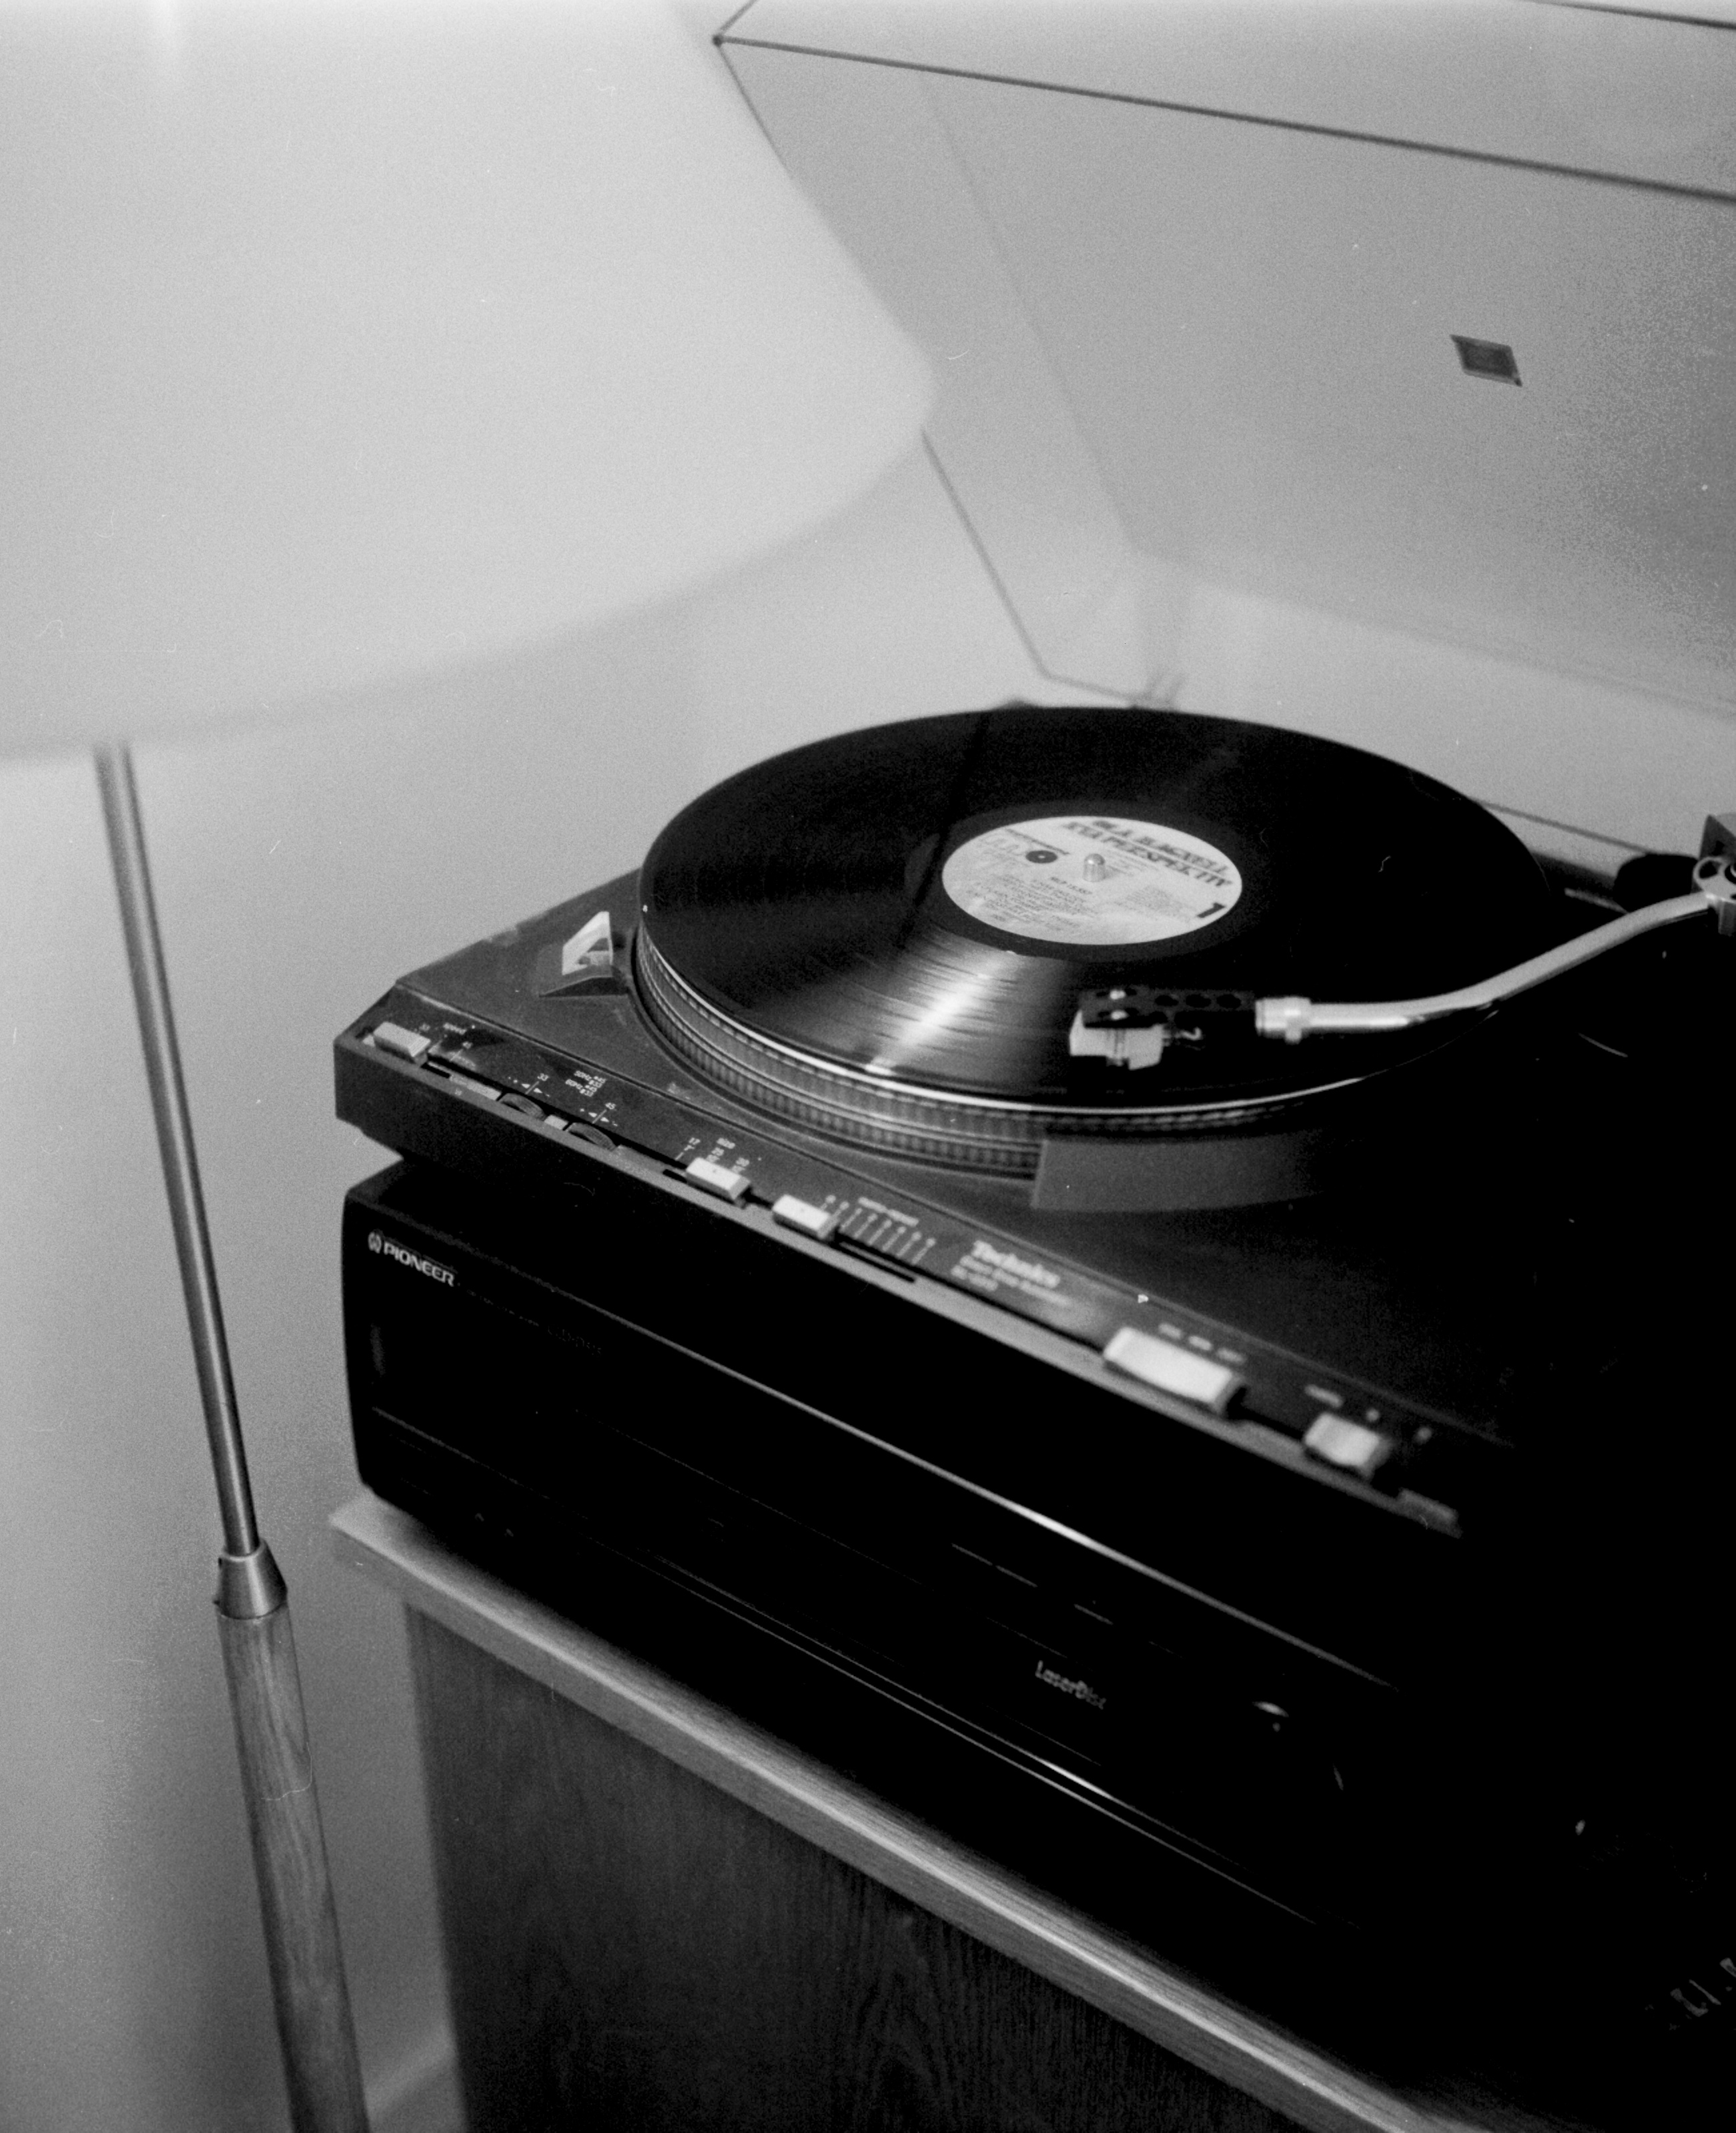
Sample shots⌗
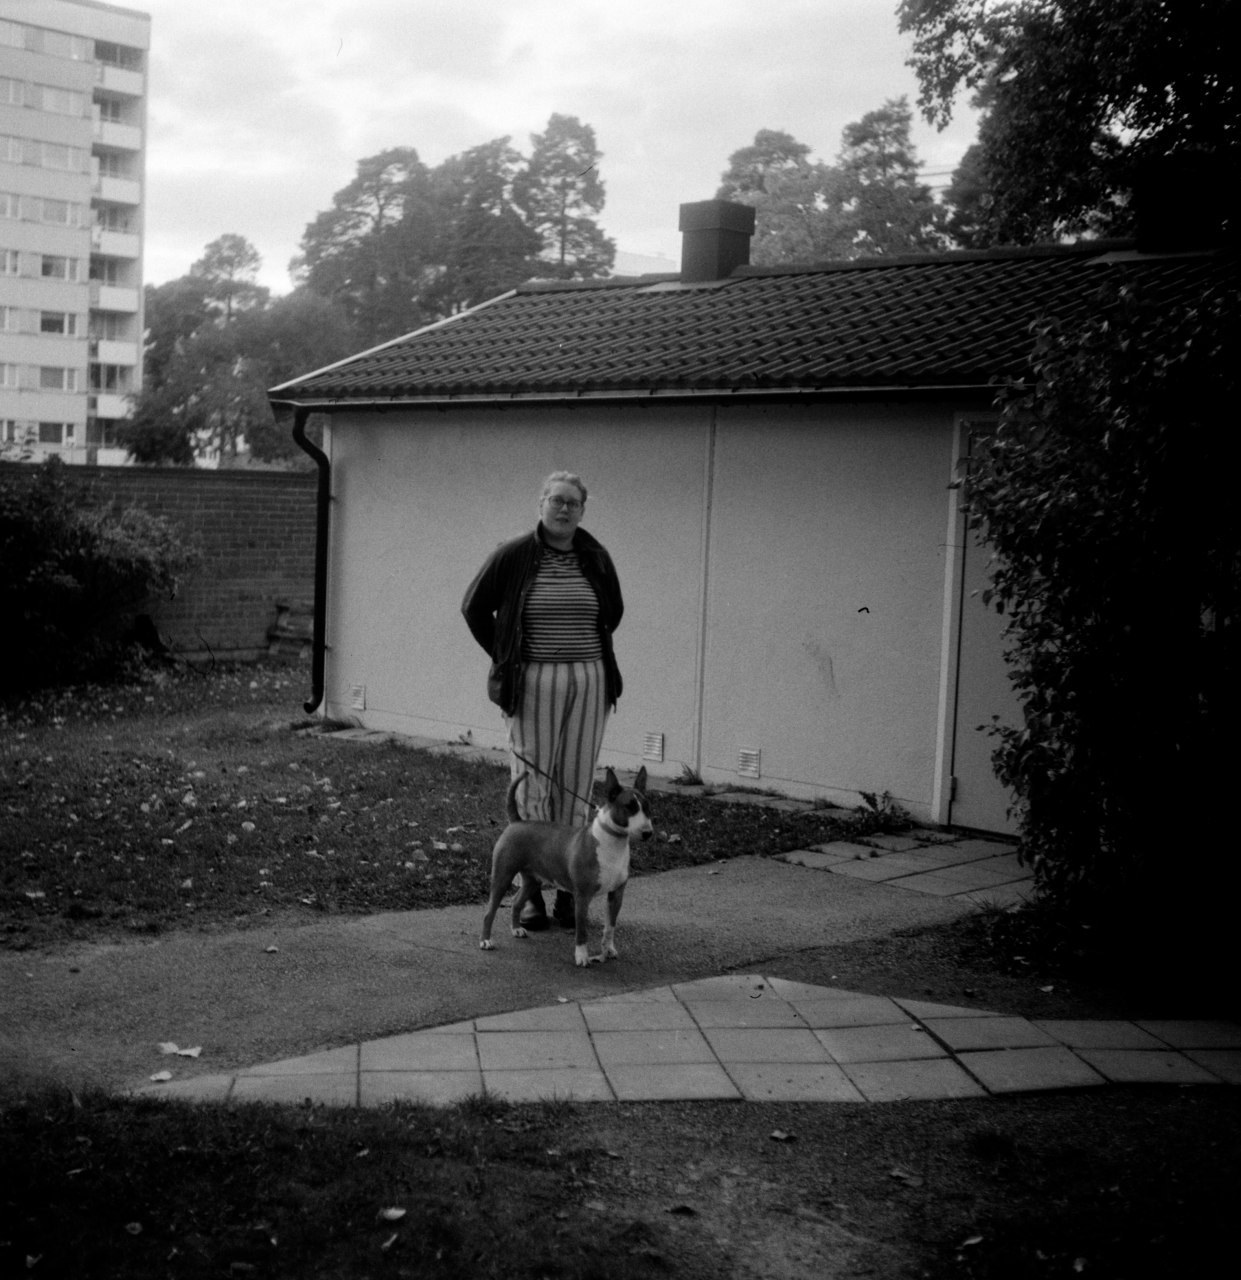
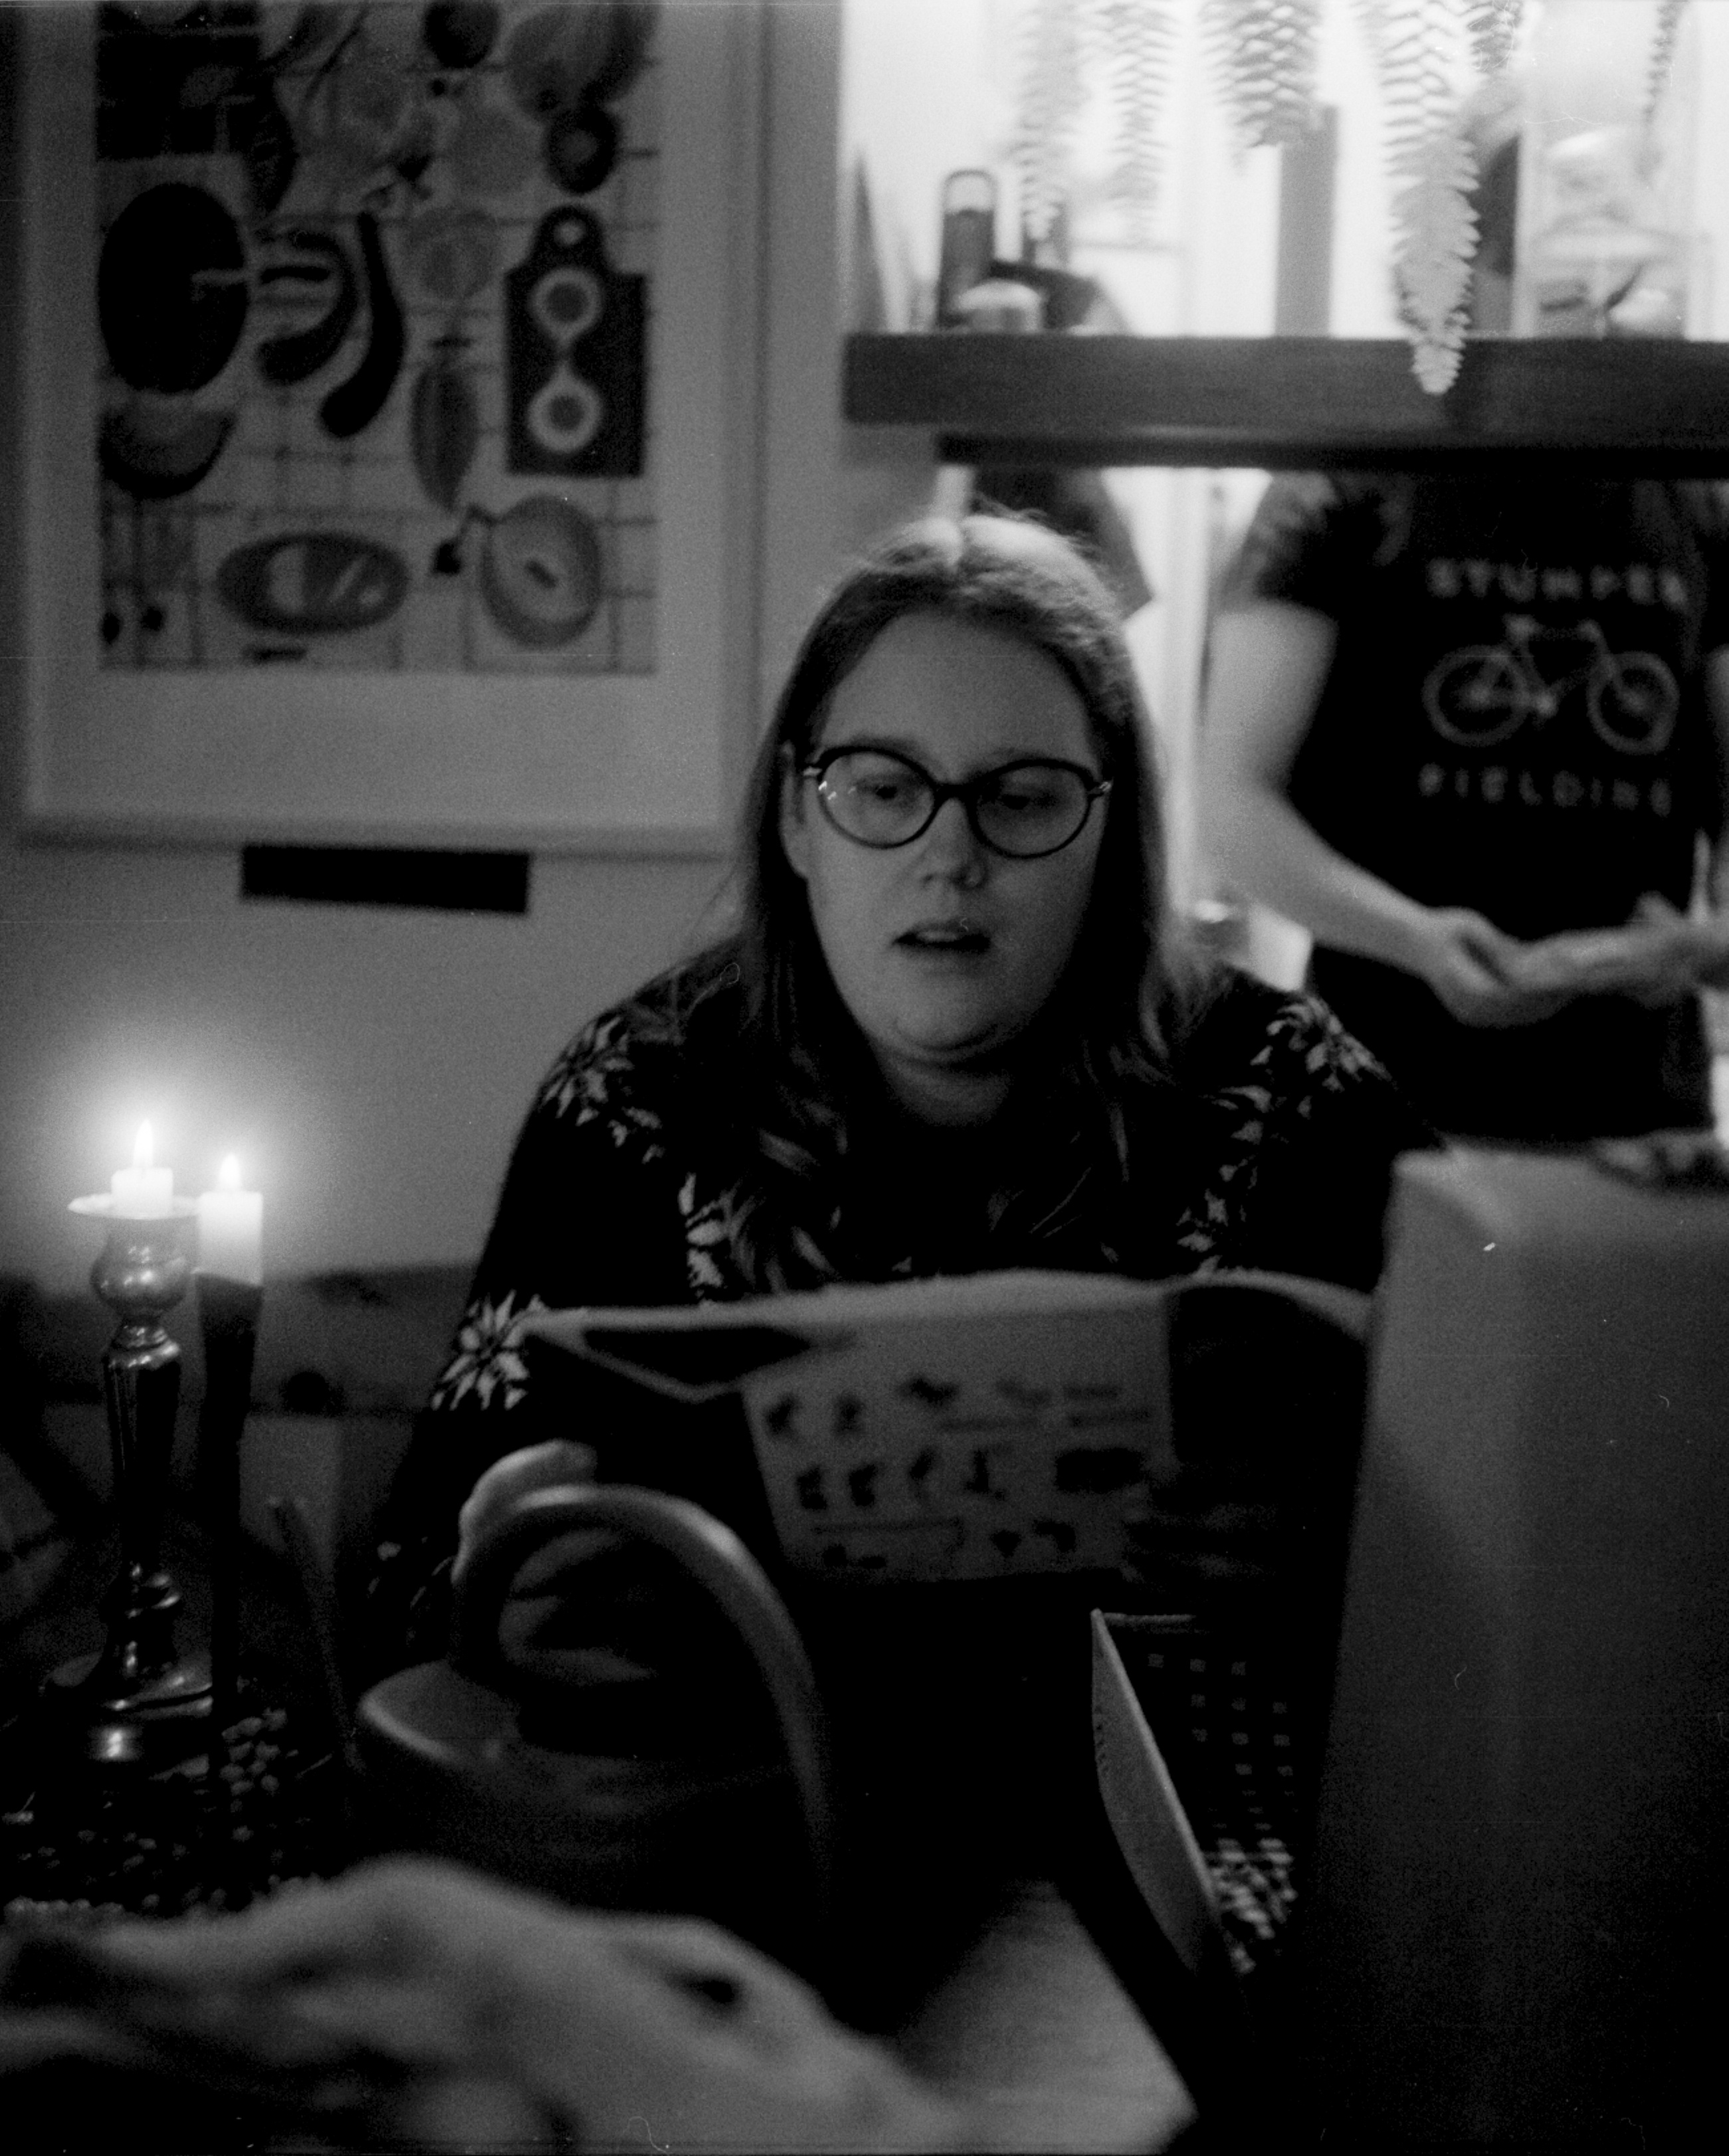
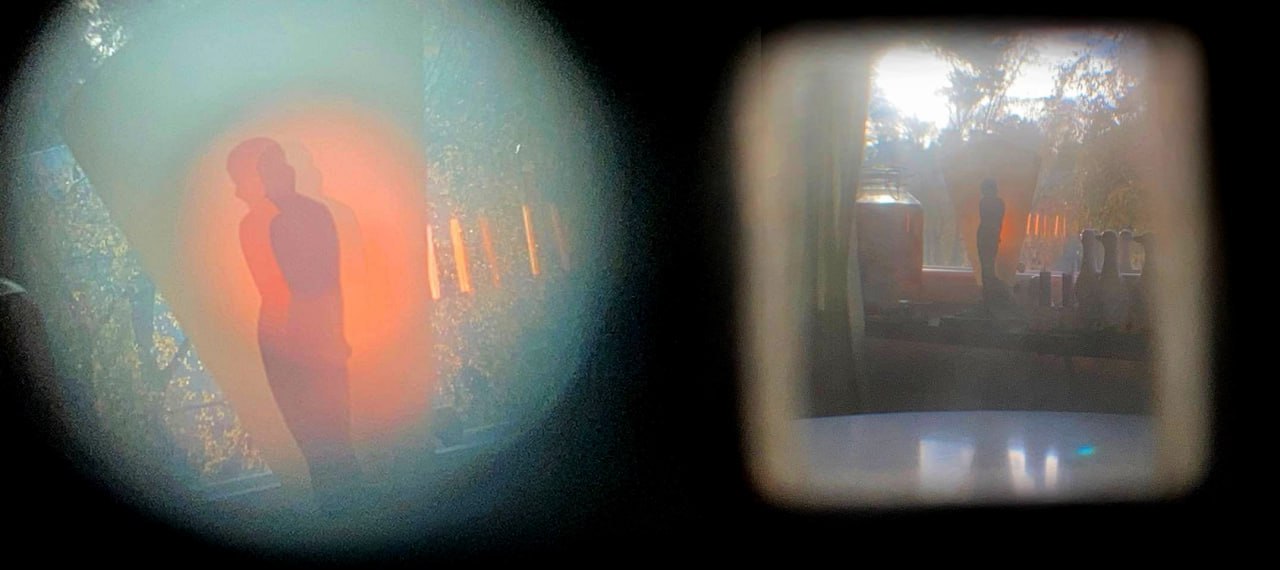
I’ll end the review with a few more sample shots: